Fireworks Straw Painting: An Incredible Ultimate Guide to 7 Amazing Designs
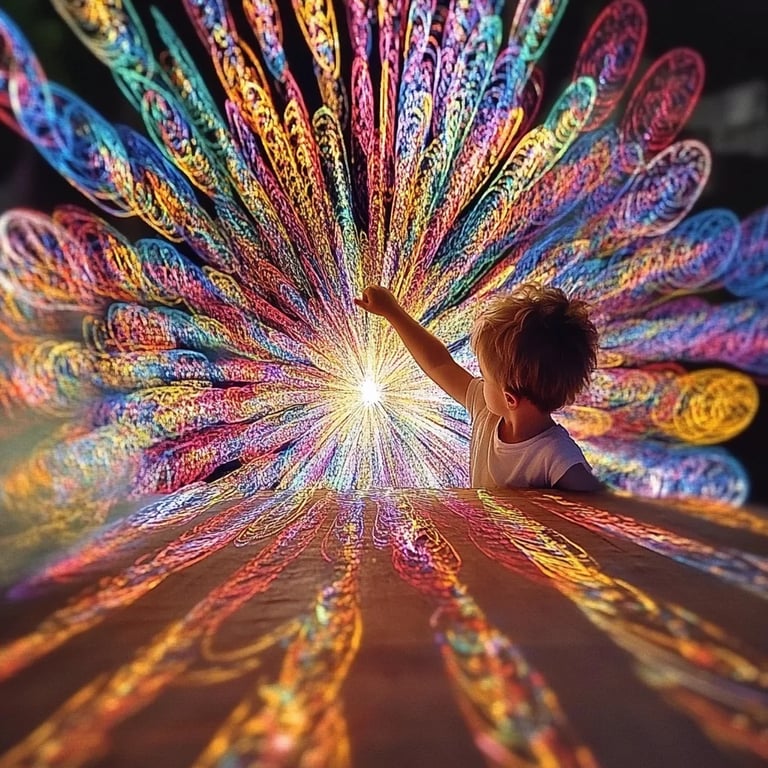
Fireworks Straw Painting is an amazing and creative activity that combines art and play. This vibrant art form allows you to express your creativity while enjoying the mesmerizing display of colors. With just a few materials and techniques, you can create stunning fireworks-inspired artworks that are perfect for all ages. Whether you are a seasoned artist or a novice, this unique painting method can spark joy and passion for art in anyone. In this ultimate guide, you’ll explore why this technique is beloved, how to prepare, and the steps to create breathtaking designs with fireworks straw painting.
Drawing inspiration from the captivating beauty of fireworks, this technique immerses you in a world of colors and patterns. The use of straws to create art adds an element of fun and excitement, making it ideal for family activities, parties, or classroom projects. Imagine creating dazzling displays on paper that mirror the explosive glory of fireworks lighting up the night sky. The process is not only enjoyable but also therapeutic, allowing you to relax and unwind while bringing your artistic vision to life.
You'll find that this guide offers everything you need to dive into the world of fireworks straw painting. From understanding the reasons to love this creative method to outlining the necessary materials, and detailed instructions for crafting stunning artworks, every section is designed to help you become proficient in this exhilarating art form.
Why You’ll Love This Recipe
Fireworks Straw Painting is much more than just a craft; it’s a delightful way to spend time expressing yourself. Here are several reasons you’ll fall in love with this hands-on art technique:
- Easy to Master – The method is simple, making it accessible to both children and adults.
- No Special Skills Required – You don’t need to be a professional artist; anyone can create stunning pieces.
- Endless Creativity – Use different colors and patterns to make each artwork unique.
- Family-Friendly Activity – It’s perfect for family gatherings or parties, encouraging teamwork and fun.
- Educational Benefits – This art form can enhance fine motor skills and promote creative thinking.
- Minimal Cleanup – The materials used are easy to manage, making clean-up a breeze.
- Beautiful Keepsakes – You can create artworks to decorate your space or give as personalized gifts.
With all these benefits, it’s easy to see why fireworks straw painting is a favorite choice among crafters and families alike. Embrace the opportunity to unleash your creativity while having a blast with this engaging technique!
Preparation and Cooking Time
While fireworks straw painting doesn't involve cooking, it does require some preparation before diving into the creative process. Here’s a breakdown of the time you might need:
- Preparation Time: 10-15 minutes (to gather materials and set up).
- Active Painting Time: 30-60 minutes (depending on the complexity of your designs).
- Drying Time: Approximately 1-2 hours (varies with paint types).
Setting up in a well-lit and no-mess area enhances your experience. Make sure the painting surface is protected, especially if you are working with young kids.
Ingredients
Here’s a list of materials needed for your fireworks straw painting:
- White cardstock or watercolor paper
- Assorted washable paints (bright colors are preferable)
- Drinking straws (regular-sized);
- Container of water (for cleaning straws)
- Paper towels (for drying straws)
- Smock or old clothing (to protect against paint stains)
- Palette or paper plates (for holding paint)
- Optional: glitter or metallic ink for added effects
With these simple ingredients, you are ready to embark on an artistic adventure that captures the brilliance of fireworks on paper!
Step-by-Step Instructions
Creating breathtaking pieces with fireworks straw painting is an enjoyable process. Follow these steps to craft your artistic masterpiece:
- Set Up Your Workspace: Cover your table with newspaper or a plastic sheet to catch any spills.
- Prepare Your Materials: Gather all your supplies, ensuring you have a clear workspace.
- Squirt Paint on Palette: Place small amounts of different paint colors on your palette or paper plates.
- Dip the Straw: Take a drinking straw and dip one end into the first color of paint.
- Position Your Paper: Hold your cardstock or watercolor paper horizontally on your workspace.
- Blow Through the Straw: Place your mouth on the opposite end of the straw, then blow sharply to create splatters and bursts of color on the paper.
- Experiment with Colors: Repeat steps 4-6, experimenting with different colors and techniques, such as blowing softly for small dots or harder for larger splatters.
- Rotate and Layer: Rotate your paper and layer different colors to create depth and excitement.
- Add Sparkle (Optional): If desired, sprinkle glitter or use metallic ink to add a sparkling effect.
- Allow to Dry: Let your artwork dry completely before handling it. This can take 1-2 hours depending on the paint used.
Enjoy the delightful process of creating stunning fireworks straw paintings—it's about the journey as much as the final result!
How to Serve
Once your fireworks straw paintings are complete, consider how to display or share your creations:
- Framing: Frame your artwork in colorful frames to enhance its beauty. This adds a personal touch when displaying at home.
- Gifting: Present your finished artworks as personal gifts to family and friends on special occasions.
- Gallery Wall: Create a gallery wall featuring multiple pieces, showcasing different designs and colors for impact.
- Art Parties: Host an art party where participants can create their own fireworks straw paintings while enjoying snacks and music.
- Showcase Online: Share images of your artwork on social media platforms to inspire others to try this enjoyable technique.
By putting thought into how you present your artwork, you create an experience that highlights your creativity and the joy of fireworks straw painting!
Get ready to unleash a world of colorful creativity and have fun exploring this incredible art method!
Additional Tips
- Experiment with Techniques: Try blowing through the straw from different angles to create varied effects. This adds individuality to each piece.
- Mix Paints for Unique Shades: Don’t hesitate to mix colors on your palette for custom shades that can enhance your artwork.
- Incorporate Other Tools: Consider using cotton swabs or brushes to complement your straw painting, adding details or highlights.
- Control Paint Consistency: If the paint is too thick, dilute it with a few drops of water to achieve the desired consistency for blowing.
- Encourage Imagination: Let the artworks tell a story. Use your creations as inspiration for narratives that capture the essence of your colorful designs.
Recipe Variation
Feel free to explore these different variations of fireworks straw painting to keep the experience fresh and exciting:
- Themed Art: Instead of traditional firework patterns, create artworks inspired by specific themes—like seasons or holidays.
- Use Different Mediums: Instead of paint, try using liquid food coloring or colored inks for a different visual effect.
- Mixed Media: Incorporate other art materials, such as markers or stickers, to add layers and dimensions to your fireworks straw paintings.
- Collaborative Art: Create a giant collaborative piece where multiple artists work together on a large sheet of paper, generating a unique communal artwork.
Freezing and Storage
While fireworks straw painting results in vibrant art pieces rather than food, knowing how to store your artistic creations is vital:
- Storage: Once dry, store the artwork flat in a protective folder or between sheets of wax paper to prevent smudging or damage.
- Display Options: If you plan to showcase your pieces, consider hanging them in frames or clipboards to protect the surface and enhance visibility.
Special Equipment
You won’t need much specialized equipment, but having certain items can enhance your fireworks straw painting experience:
- Stencils: Various stencils can help create geometric or themed designs if you want a little extra structure in your artwork.
- Blowing Tools: Consider using different sizes of straws to create distinct splatter effects, from tiny bursts to larger explosions of paint.
- Protective Gear: Ensure kids wear apron smocks to protect their clothes. This makes the experience worry-free and more enjoyable.
Frequently Asked Questions
Can we use other types of paint?
Yes, different types of paint work. Just ensure they are washable for easier cleanup.
Is this technique suitable for all ages?
Absolutely! Fireworks straw painting is a fun activity for kids and adults alike.
Do I need to be an artist to create good artworks with this method?
No prior skills are necessary—everyone can create beautiful pieces!
How can I enhance the drying process?
Using a fan can help speed up the drying time of your paint.
Can I use this technique on surfaces other than cardstock?
While cardstock and watercolor paper are preferred, you can experiment with other absorbent materials.
Conclusion
Fireworks straw painting is not just an art technique; it’s an engaging way to explore creativity, bonding with family and friends in a fun atmosphere. This guide has provided you with all the tools you need to delve into this colorful world. With just a few materials and a sprinkle of imagination, you can create enchanting pieces that capture the essence of fireworks. So gather your supplies and let your artistic journey begin; the sky is the limit!