DIY Under the Sea Snow Globe: An Incredible, Amazing 7-Step Guide
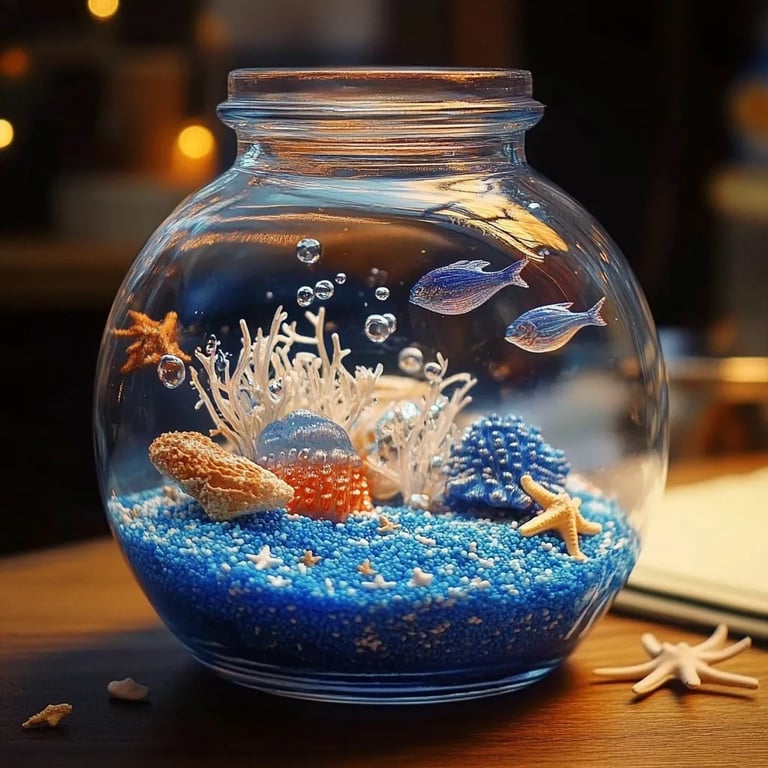
DIY Under the Sea Snow Globe is a delightful craft that can bring a touch of the ocean right into your home. This creative project allows you to immerse yourself in a world of colorful marine life, while also recycling some everyday materials. Imagine shaking the globe and watching tiny sparkles dance like bubbles in the ocean! This craft is not just visually stunning, but also wonderfully therapeutic. It’s the perfect way to channel your inner artist while creating something beautiful to display or give as a gift.
Creating your own snow globe can be a truly memorable activity. The process allows for personalization; you can include your favorite colors, miniature figures, and even sentimental items. Making a DIY Under the Sea Snow Globe is an incredible way to unleash your creativity while enjoying quality time with family or friends. Plus, it’s a fantastic winter project or a fun summer activity that can brighten your day!
In this guide, you will discover everything you need to know to create your own stunning snow globe. From the reasons you'll love this project to the step-by-step instructions, each section is designed to ensure your snow globe turns out just as spectacular as you imagined. Let’s dive into this underwater adventure and create something amazing together!
Why You'll Love This DIY Under the Sea Snow Globe
The DIY Under the Sea Snow Globe brings a sense of joy and relaxation with every swirl of glitter and whimsical figures. There are several reasons why this project resonates with crafters of all ages:
- Easy to Personalize: With various marine-themed figurines available, you can customize your globe to fit personal tastes.
- Creative Expression: This project allows you to explore your creativity. You can choose colors, accents, and decorations that speak to you.
- Great for All Ages: This is a wonderful craft for kids, teens, and adults alike. Everyone can participate in assembling their unique designs.
- Perfect Gift Idea: Finished snow globes make heartfelt gifts. They serve as beautiful keepsakes that can be cherished for years.
- Relaxing Activity: Crafting can be therapeutic. This snow globe project provides an opportunity to unwind while creating something beautiful.
- Affordable and Accessible: Most of the materials are easy to find and budget-friendly, making it accessible for everyone.
When you create your own DIY Under the Sea Snow Globe, the process turns into a joyful and rewarding experience. Each globe tells a story, showcasing your creativity and love for all things oceanic!
Preparation and Cooking Time
To assemble your DIY Under the Sea Snow Globe efficiently, it's essential to prepare before diving into the crafting process. Below is an overview of the time you'll need:
- Preparation Time: 20 minutes
- Crafting Time: 40 minutes
- Drying Time: 30 minutes (varies based on glue used)
Totaling about 1 hour and 30 minutes, this makes for an enjoyable creative session without feeling rushed. It allows enough time to incorporate thoughtful details into your snow globe's design.
Ingredients
Here is a list of materials you will need to create your DIY Under the Sea Snow Globe:
- A clean glass jar with a lid (a mason jar works great)
- Distilled water
- Glycerin (optional, for slowing down the float time of the glitter)
- Clear glitter or aqua-colored mini sequins
- Miniature sea creatures or themed decorations (e.g., fish, seashells)
- Hot glue gun and glue sticks
- Food coloring (blue or green for the water)
- Decorative elements (sand, rocks, or blue ribbon for added flair, optional)
Having these materials handy will streamline the process and ensure you don’t get stuck halfway!
Step-by-Step Instructions
Creating your DIY Under the Sea Snow Globe can be straightforward if you follow these simple steps:
- Choose Your Jar: Select a clean glass jar that will serve as the globe. Make sure the lid seals tightly.
- Prepare the Base: Glue your chosen miniature sea creatures to the inside of the lid using a hot glue gun. Ensure they are centered as this will be the top when turned upright.
- Fill the Jar: Pour distilled water into the jar, filling it almost to the top. If desired, add a few drops of food coloring for an oceanic hue.
- Add Glycerin: Add about a teaspoon of glycerin to the water. This will help the glitter float more slowly.
- Sprinkle Glitter: Add a generous amount of clear glitter or mini sequins into the jar. This will mimic bubbles or water movement.
- Seal the Globe: Carefully place the lid with the glued figures onto the jar, ensuring a tight seal. Wipe away any excess glue that may have squeezed out.
- Shake and Enjoy: Turn the jar upside down and give it a gentle shake. Watch as the glitter dances in your DIY Under the Sea Snow Globe!
By following these steps, you’ll create an enchanting snow globe that showcases the beauty of the sea right in your living space.
How to Serve
Once your DIY Under the Sea Snow Globe is complete, consider the following options for serving or displaying your creation:
- Display on a Shelve: Place your snow globe on a shelf, desk, or mantelpiece as a decorative piece to brighten any room.
- Gift Presentation: Wrap it in clear cellophane and tie it with a ribbon for a personal gift. Include a small card with a message for added charm.
- Marine Themed Parties: Use several snow globes as centerpieces for ocean-themed parties or events. They can double as party favors!
- Interactive Display: Set up a small station where guests can shake and admire each snow globe, making it a fun focal point.
This DIY project not only transforms your space but also brings warmth and creativity into your home or as a thoughtful gift for friends and loved ones. Enjoy your crafting journey!
Additional Tips
- Choose the Right Water: For clarity, distilled water works best, preventing impurities from clouding your snow globe.
- Experiment with Colors: Add a few drops of food coloring to create a gradient effect in your globe.
- Seal It Well: Make sure the lid of the jar is tightly sealed to prevent leaks or evaporation of the water.
- Safety First: If crafting with children, supervise any use of hot glue.
- Use a Clear Jar: A glass or plastic jar will allow light to reflect off the glitter, enhancing your snow globe's beauty.
Recipe Variation
You can give your DIY Under the Sea Snow Globe a personal touch with these creative variations:
- Different Themes: Instead of sea creatures, use other miniature figurines like fairies, unicorns, or even outer space themes.
- Seasonal Colors: Change the color of the glitter to match seasons—for instance, gold and red for winter holidays.
- Add More Elements: Incorporate tiny stones, colored sand, or dried flowers to create a different aesthetic.
- Layered Effects: To create a layered look, use different sizes of glitter, starting from larger pieces at the bottom to finer glitter on top.
Freezing and Storage
- Storage: If you want to keep your DIY Under the Sea Snow Globe in pristine condition, display it out of direct sunlight to reduce fading. Avoid storing it in overly warm areas.
- Refresher: If the glitter settles, just give it a little shake to revitalize the floating effect.
Special Equipment
To successfully create your DIY Under the Sea Snow Globe, gather the following tools:
- Hot glue gun: Essential for attaching decorative figures.
- Spoon or funnel: Helpful for pouring water and glitter into the jar.
- Measuring spoons: Use these for adding glycerin and food coloring accurately.
- Clear workspace: Ensure you have a clean, clutter-free area to protect your crafting supplies.
Frequently Asked Questions
Can I use tap water for the snow globe?
While you can use tap water, distilled water is recommended as it prevents cloudiness.
How can I make the glitter float better?
Adding glycerin helps slow down the glitter, making it appear more like slowly floating bubbles.
What should I do if my globe leaks?
If your globe leaks, remove the lid and reseal it with more glue. Make sure it’s tightly secured.
Can children do this project?
Absolutely! This project is family-friendly with parental supervision, especially during the hot glue application.
How long will my snow globe last?
As long as it is kept sealed and out of sunlight, your snow globe can last for many years.
Conclusion
Crafting a DIY Under the Sea Snow Globe is more than just a craft; it's a creative journey that brings joy and relaxation. This beautiful project allows for personal expression while captivating the essence of the ocean. It’s perfect for all ages, making it a wonderful activity for family and friends. Plus, the finished product serves as a charming gift or decoration that can brighten any space. With these steps, tips, and variations, you are well-equipped to dive into this crafting adventure and bring a piece of the ocean to life in your own home.