DIY Rainbow Spectrum Suncatcher: An Amazing Ultimate Project with 5 Steps
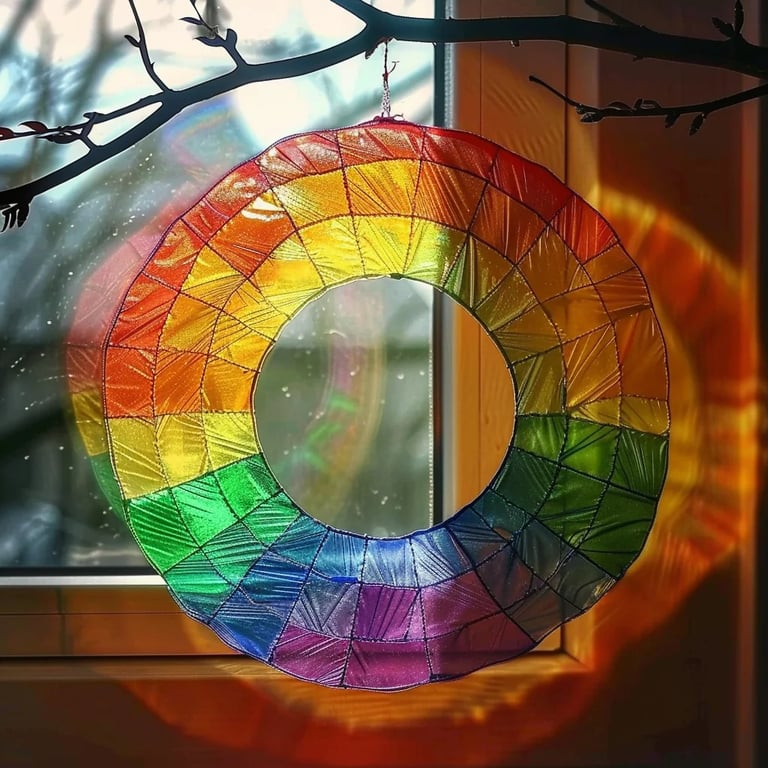
DIY Rainbow Spectrum Suncatcher is a delightful project you can create to fill your home with colors and positivity. This creative endeavor not only enhances your living space but also uplifts your mood as the sunlight hits the intricate patterns of your suncatcher. Imagine rays of colorful light dancing around your room, creating a beautiful atmosphere. Whether you’re crafting for yourself, your children, or to give as gifts, this project is undoubtedly gratifying and enjoyable.
Creating a DIY Rainbow Spectrum Suncatcher allows you to explore your artistic side. You'll get to work with vibrant colors and unique designs, making every piece one-of-a-kind. The process is quite simple and requires minimal materials, making it accessible even for those without extensive crafting experience. Plus, the end result is always rewarding—a stunning piece that brightens any window.
If you're searching for a fun craft to do at home or an educational activity to engage your kids, making a suncatcher can be both fun and instructive. As you create and observe how light interacts with the materials, you will also cover basic concepts of art and science. In this guide, you'll learn everything you need about this DIY project, including its benefits, preparation time, materials, and step-by-step instructions. Let’s dive in and decorate your space with a beautiful splash of colors!
Why You’ll Love This Project
The DIY Rainbow Spectrum Suncatcher is not just a craft; it’s an experience. Here are some reasons why you’ll love making this stunning piece:
- Creative Expression: Each suncatcher allows you to express your personality through colors and designs.
- Fun for All Ages: This project is suitable for children and adults alike, making it a great family activity.
- Easy to Make: With straightforward materials and steps, even beginners can achieve great results.
- Stunning Visuals: Once completed, the suncatcher brings beauty and light into your home.
- Educational: It provides a chance to learn about colors, light refraction, and art principles.
With these elements in mind, it's clear that creating a DIY Rainbow Spectrum Suncatcher is a rewarding artistic venture!
Preparation and Cooking Time
Creating your DIY Rainbow Spectrum Suncatcher will take about 1 hour and 30 minutes from start to finish. Here's a quick breakdown of the time:
- Preparation Time: 15 minutes
- Crafting Time: 1 hour
- Drying Time: 15 minutes (depends on your choice of glue)
This time frame may slightly vary depending on your experience and the specific materials used, but this should provide a good estimate for planning your crafting session.
Ingredients
- Transparent plastic sheet or wax paper
- Colored tissue paper or colored cellophane
- Scissors
- Clear craft glue or Mod Podge
- Paintbrush (optional)
- Black marker (optional for outlines)
- String or fishing line for hanging
- Hole punch (optional)
Step-by-Step Instructions
Creating your suncatcher is a straightforward and fun process. Follow these steps to make your DIY Rainbow Spectrum Suncatcher:
- Prepare Your Work Area: Lay down newspaper or a plastic tablecloth to protect surfaces from glue or scraps.
- Cut the Base: Cut a piece of clear plastic sheet or wax paper into your desired shape (e.g., circle, heart, or star).
- Prepare Your Tissue Paper: Cut the colored tissue paper or cellophane into small pieces or shapes.
- Create Your Design: Arrange the tissue paper pieces on the base, forming a colorful pattern you love. You can overlap colors for a more vibrant effect.
- Glue the Tissue Paper: Apply clear craft glue or Mod Podge on the back of each tissue paper piece, ensuring they stick to the base properly. You may also cover the entire surface with glue for a smooth finish.
- Let It Dry: Allow the suncatcher to dry for about 15 minutes. Double-check that all parts are securely glued down.
- Add a Hanging Mechanism: If you wish, use a hole punch to create a hole at the top of the suncatcher. Thread a piece of string or fishing line through the hole for hanging.
- Display Your Creation: Find a sunny window, and hang your DIY Rainbow Spectrum Suncatcher where it can catch the light!
These steps will lead you to an incredible DIY project that infuses your space with color and charm.
How to Serve
To showcase your beautiful DIY Rainbow Spectrum Suncatcher effectively, consider the following:
- Choose the Right Location: Hang your suncatcher in a window where sunlight can illuminate it. Locations that receive light throughout the day will produce the best visual effects.
- Pair with Decorative Elements: Consider adorning the window space with plants or other artsy finds to enhance the overall presentation.
- Adjust Height: Ensure the suncatcher is at a height where it can be admired without obstruction. A place where it can sway gently in the breeze can add to its charm.
- Gift Idea: This suncatcher makes an excellent handmade gift. Consider adding a small note about its creation or the vibrant colors used to personalize the gift even more.
By following these tips, you can create a stunning display that not only makes your home brighter but also attracts admiration from guests and family alike. Enjoy the cheerful glow of your DIY Rainbow Spectrum Suncatcher as it transforms the light in your living space!
Additional Tips
- Choose Vibrant Colors: For your DIY Rainbow Spectrum Suncatcher, opt for bright and bold colors. These will stand out beautifully when sunlight passes through.
- Experiment with Patterns: Don’t hesitate to experiment with different designs. You can create swirls, stripes, or even a themed pattern with your colors.
- Seal for Extra Durability: Once completed, applying a coat of clear spray sealant can enhance durability and give a glossy finish.
- Involve Family and Friends: Crafting can be more fun with company. Invite others to join in, creating a delightful crafting session.
- Make Seasonal Variants: Consider creating seasonal suncatchers. Use autumn colors in fall or pastels for spring to keep your decor fresh year-round.
Recipe Variation
Feel free to get creative! Here are some variations for your suncatcher:
- Different Shapes: Instead of traditional shapes, try unconventional ones like animals or nature themes.
- Layered Suncatchers: Create layers by making multiple suncatchers. Stack them on top of each other for depth and complexity.
- Personalized Touches: Add personal symbols or initials using black marker to make each suncatcher unique and meaningful.
- Stained Glass Effect: Use more transparent materials to achieve a stained glass look which can give your suncatcher a sophisticated finish.
- Themed Colors: Create themed suncatchers for holidays or special occasions, such as red and green for Christmas or pastels for Easter.
Freezing and Storage
- Storage: Once created, your DIY Rainbow Spectrum Suncatcher can be hung immediately. For safekeeping, lay it flat in a protective box when not displayed to prevent bending.
- Long-Term Preservation: Plan to store the suncatcher in a cool, dry place, away from direct sunlight when not being displayed. This extends its lifespan and keeps the colors vibrant.
Special Equipment
To effectively create your DIY Rainbow Spectrum Suncatcher, having the right tools can make the process smoother:
- Cutting Tools: A good pair of scissors is essential for cutting the base and tissue materials.
- Crafting Glue: Clear craft glue or Mod Podge is ideal for affixing the tissue paper to the base.
- Paintbrush: Optional but helpful for spreading glue evenly, especially on larger areas.
- Hole Punch: Useful for creating holes if you wish to hang the suncatcher creatively.
Frequently Asked Questions
How long will my suncatcher last?
If properly stored and displayed, a DIY Rainbow Spectrum Suncatcher can last for years, maintaining its vibrant colors.
Can I use alternative materials?
Absolutely! Fusion of different materials, like clear plastic and even thin glass, can create varied effects.
What if I don't have a hole punch?
You can skip the hole punch and tie the string around the top or find an alternative method to hang your suncatcher.
Can kids participate in this project?
Yes! This project is family-friendly and a great way for children to learn about colors while experiencing hands-on creativity.
How do I clean my suncatcher?
Cleaning can be done using a damp cloth. Avoid harsh chemicals to keep the integrity of your crafted materials intact.
Conclusion
Crafting a DIY Rainbow Spectrum Suncatcher is not just an art project; it’s a joyful experience that brings color and cheer into any space. By following these steps and tips, you can make a suncatcher that reflects your personality and creativity. The interplay of light and colors will create an enchanting atmosphere in your home, serving as a daily reminder of the beauty in simplicity. Gather your materials, unleash your creativity, and enjoy this delightful crafting experience with family or friends!