DIY Leaf Print Window Art: An Amazing Ultimate Guide to 10 Simple Steps
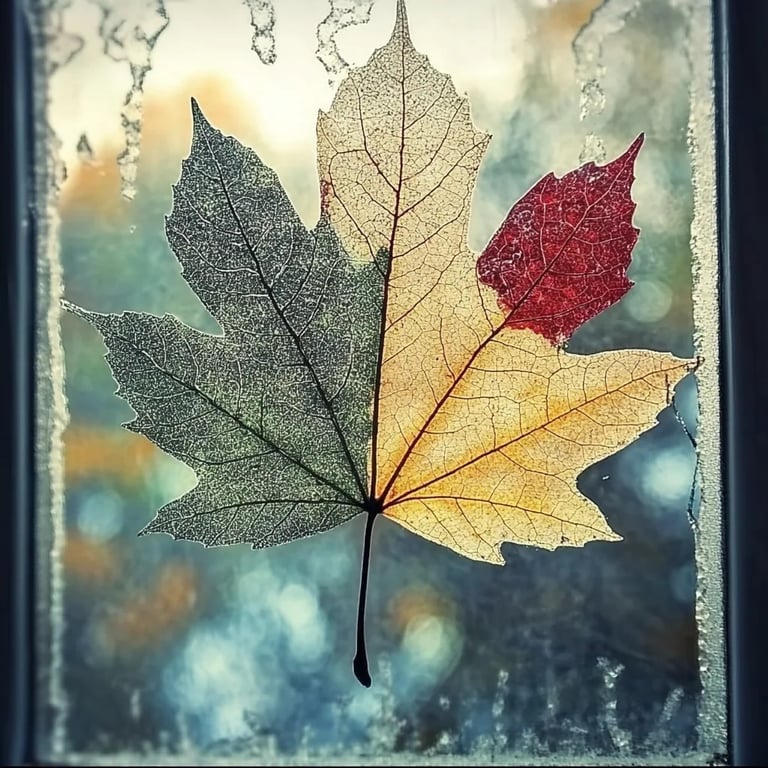
DIY Leaf Print Window Art is an amazing way to bring a touch of nature into your home. Using leaves to create vibrant designs is not only fun but also allows you to explore your creativity while appreciating the beauty of the natural world. This art project is perfect for all ages and can be an enjoyable activity for families or even a solo endeavor. By simply combining a few easy-to-find materials and techniques, you can transform your windows into stunning displays of color, pattern, and texture that celebrate the changing seasons.
Imagine waking up in the morning to sunlight streaming through beautifully designed leaf prints, each unique and full of character. Such a delightful sight creates an inviting atmosphere and inspires a sense of calm and connection to nature. Moreover, creating your own leaf print window art is a sustainable practice that encourages recycling and appreciating diversity in the natural environment. The process of collecting leaves and using them as stamps or stencils is not only educational but also fosters mindfulness and creativity.
This guide will walk you through everything you need to know about creating your DIY Leaf Print Window Art, from the materials required to the step-by-step instructions. You will discover how easy and enjoyable this project can be. Additionally, you'll learn how to choose the best leaves and paints for impactful prints that enhance your living space. This ultimate guide is designed to empower you to unleash your inner artist and create amazing leaf prints that you can proudly display.
Why You’ll Love This DIY Leaf Print Window Art
There are countless reasons to fall in love with the DIY Leaf Print Window Art project. Here’s why this creative endeavor stands out:
- Accessible and Affordable – Most of the materials you need are inexpensive, and many can be found around your home.
- Eco-Friendly Fun – Using natural materials reduces waste and promotes an appreciation for the environment.
- Creative Expression – This project allows for unlimited creativity; you can choose various leaf shapes and colors to design a unique masterpiece.
- Engaging for All Ages – Whether you're working with children, teens, or adults, this project can be tailored for everyone.
- A Great Educational Opportunity – Explore types of leaves, their shapes, and how they create impressions, enriching your knowledge about nature.
- Seasonally Inspired Designs – You can change your window art with the seasons, showcasing beautiful leaves from spring flowers to autumn trees.
- Personalized Decor – Your designs will reflect your individual style, making your home feel even more inviting.
The possibilities are endless, which is why DIY Leaf Print Window Art remains a cherished favorite among many artists and homeowners alike!
Preparation and Required Time
Creating DIY Leaf Print Window Art does not have to be time-consuming. Here’s what you can expect in terms of preparation and execution:
- Preparation Time: 30 minutes (this includes gathering materials and preparing the workspace)
- Creating Time: 1 hour (depends on the complexity of your design and drying times)
- Total Time: Approximately 1 hour and 30 minutes
These time estimates offer a guideline, but you might find yourself fully absorbed in the process, leading to an extended creative session.
Materials Needed
To embark on your DIY Leaf Print Window Art, gather the following materials:
- Fresh leaves of various shapes and sizes (e.g., maple, oak, fern)
- Non-toxic acrylic paint or water-based craft paint
- Paintbrushes or foam brushes
- Palette or paper plate for paint
- A clean sponge
- Sturdy paper or canvas (for prints)
- Wax paper (optional, for cleanup)
- Tape (for securing leaves or artwork)
- Window cleaner or glass cleaner (for cleaning the surface)
Optional Enhancements
- Glaze or sealant spray for protection
- Glitter or embellishments for added flair
- Canvas or decorative frames for showcasing your artwork
Step-by-Step Instructions for DIY Leaf Print Window Art
Follow these steps to create your incredible leaf prints:
- Gather Your Leaves: Collect fresh leaves from your garden or a nearby park. Choose a variety of leaves to create interesting shapes and textures.
- Clean the Leaves: Rinse the leaves under water to remove dirt or dust. Pat them dry with a clean cloth.
- Prepare Your Workspace: Lay down wax paper or an old newspaper to protect your work surface from paint spills.
- Apply Paint to Leaves: Use a paintbrush or foam brush to gently apply a layer of non-toxic paint on one side of the leaf. Ensure even coverage without overloading the paint.
- Position the Leaf: Place the painted side of the leaf onto your sturdy paper or canvas, pressing down gently to ensure contact.
- Press Evenly: Use your fingers or a clean sponge to apply even pressure across the leaf for the best imprint.
- Lift the Leaf: Carefully peel the leaf off the paper to reveal your print. Set the aside securely until you're ready for another print.
- Repeat for Additional Prints: Continue painting and printing leaves until you achieve your desired design. Feel free to mix and match leaf types!
- Dry the Prints: Allow your prints to dry completely before handling or displaying them.
- Display Your Artwork: Once dried, consider framing the prints, or if creating window art, use tape to secure the finished leaves to your window!
How to Serve
To maximize your enjoyment of DIY Leaf Print Window Art, consider the following serving ideas:
- Decorate Your Windows: Use your prints to create seasonal displays. Change them out frequently to keep your decor fresh and exciting.
- Gift Your Creations: Consider gifting a beautiful print to friends and family or using them as unique, handmade cards for special occasions.
- Create a Gallery: Dedicate a wall or space in your home to showcase multiple prints together, allowing for a stunning display that changes with the seasons.
- Integrate into Seasonal Decor: Use your leaf art as part of your seasonal decorations, pairing them with other items like pumpkins in fall or flowers in spring.
By embracing your creativity through DIY Leaf Print Window Art, you not only enhance your home's atmosphere but also create lasting memories with your loved ones. Have fun painting and printing, and let your creativity flow!
Additional Tips
- Experiment with Leaf Types: Different leaves yield varying textures and patterns. Particularly intricate leaves like ferns or those with distinct vein structures can make stunning prints.
- Mix Paint Colors: Don't hesitate to combine paint colors for unique effects. Layering colors can add depth and vibrancy to your prints.
- Preserve Leaves Before Printing: If you want to use leaves collected in advance, press them in a book or dry them out to prevent wilting.
- Create a Test Print: Before you finalize your design, do a test print on scrap paper to ensure your paint consistency is right and achieve the desired look.
Recipe Variation
Feel free to add a personal twist to your DIY Leaf Print Window Art:
- Colorful Prints: Instead of traditional green leaves, try using colorful autumn leaves or painted leaves for a more vibrant effect.
- Layering Techniques: Use multiple layers of leaves for a complex design, allowing each layer to dry slightly before applying the next to avoid smudging.
- Texture Addition: Incorporate different textures such as lace or fabric as stencils alongside leaves for mixed media art.
Freezing and Storage
- Storage: Your leaf prints can be safely stored flat between layers of wax paper in a cool, dry place. They should last for months if protected from moisture.
- Display Protection: If displaying your leaf prints in windows, consider applying a sealant to protect them from direct sunlight and fading. This will help maintain their vibrant colors over time.
Special Equipment
While the basic project is simple, these tools can enhance your experience:
- Brayer: A brayer can be beneficial for applying paint evenly over large leaves.
- Stencils: Create stencils of simple shapes to accompany your leaf prints for added artistic flair.
- Glass Cleaner Spray Bottle: For easy cleanup and preparation of your window surfaces before displaying your art.
Frequently Asked Questions
Can I use dried leaves for leaf printing?
Yes, dried leaves can work, but ensure they are not too brittle or crumbly, as they may break when pressed.
What types of paint work best for leaf prints?
Non-toxic acrylic paint or water-based craft paint is ideal as they provide vivid colors and are safe for indoor use.
How do I clean my brushes after painting?
Wash your brushes with soap and water immediately after using them to prevent the paint from hardening.
How can I ensure the best print quality?
Press evenly across the leaf and avoid excess paint; too much can lead to blurring and less defined prints.
Can children participate in this project?
Absolutely! This project is family-friendly and can provide a fun and educational experience for kids.
Conclusion
Creating DIY Leaf Print Window Art is not only a joyful and creative expression of nature's beauty but also an engaging activity for individuals and families alike. By following simple steps and utilizing easily obtainable materials, you can transform your windows into colorful displays that capture the essence of the seasons. Furthermore, this project promotes mindfulness and sustainability while allowing for endless artistic exploration. Let your imagination take flight and enjoy the process of bringing the outdoors inside!