DIY Glue Suncatchers: An Incredible Ultimate Project for Everyone
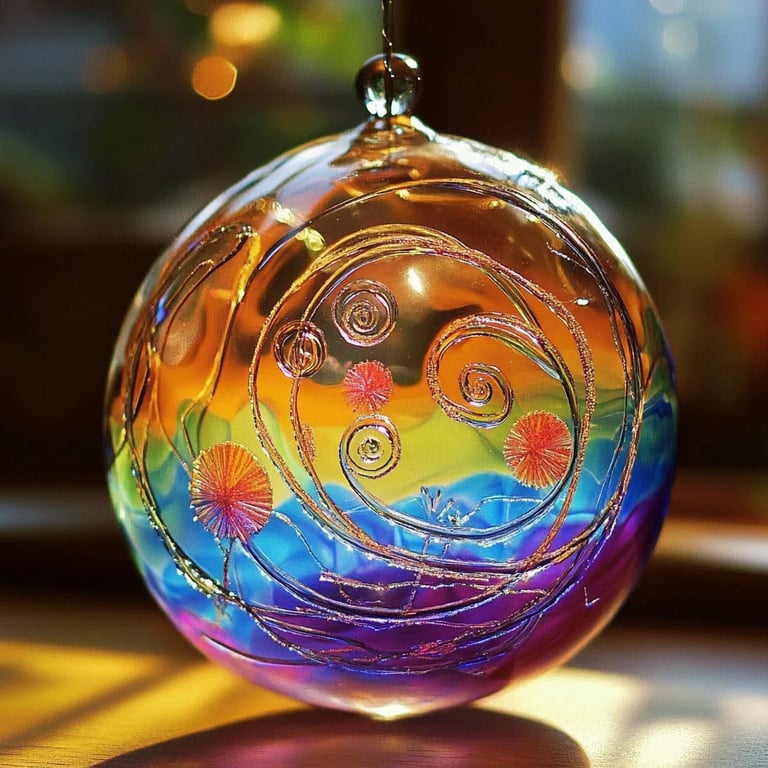
DIY Glue Suncatchers are a wonderful way to add color and charm to your windows. This engaging craft not only brightens up spaces but also provides an excellent opportunity for creativity, especially for children. The simple process of making suncatchers from glue can turn an ordinary afternoon into a delightful and productive experience. As the sun shines through these suncatchers, it creates stunning art pieces that can elevate your home décor.
These projects are perfect for various occasions, whether you are looking to fill a rainy day with fun or to create unique gifts that come from the heart. With a few basic materials, you can produce amazing suncatchers that capture light beautifully. In this guide, we'll explore everything you need to know about this incredible DIY project—from materials to the step-by-step process.
First, it’s important to note that the joy of creating your own suncatchers can resonate beyond just owning beautiful art. Whether made with kids or as a solo endeavor, this activity promotes imagination, fine motor skills, and a sense of accomplishment. Plus, each suncatcher is a unique expression of your creativity.
Let’s dive deeper into why you'll love making DIY Glue Suncatchers!
Why You'll Love This Recipe
There are numerous reasons to embrace the creation of DIY Glue Suncatchers. Here are some highlights you’ll appreciate:
- Easy and Inexpensive: Most of the materials are readily available at home or can be purchased inexpensively.
- Endless Customization: The design possibilities are limitless, from colors to shapes, allowing everyone to create something personal.
- Ideal for All Ages: This craft can be enjoyed by individuals of any age, making it an excellent family activity.
- Educational Value: As children design their suncatchers, they learn about colors and shapes, enhancing their creativity and cognitive skills.
- Beautiful Results: The stunning visual effects from the sunlight will enhance any room, making the effort worthwhile.
- Quick Setup and Cleanup: This craft requires minimal time for preparation and cleanup, allowing you to focus on fun!
With these factors, you can easily see why DIY Glue Suncatchers captivate the imagination of so many. The entire process can be enjoyable and gratifying as you watch your unique creations come to life!
Preparation and Cooking Time
Creating your DIY Glue Suncatchers requires a short amount of time and can be done in a relaxed atmosphere. Here’s a breakdown of how long the project will take:
- Preparation Time: 15 minutes (to gather materials and set up)
- Crafting Time: 30 – 45 minutes (to create your suncatchers)
- Drying Time: 4-6 hours (or overnight for best results)
It’s important to allow sufficient drying time for a durable and beautiful final product. These times are flexible and primarily depend on the complexity of your design and the drying conditions.
Ingredients
- Clear school glue
- Food coloring or liquid watercolors
- Wax paper or parchment paper
- A small mixing bowl
- Paintbrush or spoon for spreading the glue
- Tape (optional for securing the paper)
- Scissors (for cutting the paper)
- Decorative items (glitter, beads, sequins, etc. for additional flair)
Step-by-Step Instructions
Creating your own DIY Glue Suncatchers is a straightforward process that follows these easy steps:
- Prepare Your Workspace: Lay down newspaper or a plastic tablecloth for easy cleanup. Gather all your materials.
- Cut Wax Paper: Cut a piece of wax or parchment paper to your desired size. This will serve as the base for your suncatcher.
- Mix Glue and Color: In a small bowl, mix clear glue with a few drops of food coloring or liquid watercolor to create your desired colors. Feel free to create multiple colors!
- Spread Glue: Use a paintbrush or spoon to spread the colored glue onto the wax paper. Create different shapes or forms—circles, hearts, or abstract designs work well.
- Add Decorative Items: If desired, sprinkle glitter, beads, or sequins into the wet glue for added texture and sparkle.
- Let It Dry: Allow your suncatcher to dry for 4-6 hours or ideally overnight. Ensure it's placed flat to maintain its shape.
- Peel Off: Once fully dry, carefully peel the suncatcher off the wax paper.
- Cut into Shape (if desired): Use scissors to trim around your design if necessary.
- Hang Your Suncatcher: Use tape or string to hang your suncatcher in a window where it can catch the light.
These simple steps will guide you in crafting your stunning DIY Glue Suncatchers effortlessly.
How to Serve
To showcase your beautiful DIY Glue Suncatchers effectively, consider the following:
- Optimal Placement: Hang them in windows that receive direct sunlight to maximize the colorful effects.
- Variety of Sizes: Create various sizes and designs to create a delightful display.
- Group Display: Cluster multiple suncatchers together to create a dazzling collection that enhances your home's ambiance.
- Seasonal Updates: Update your suncatchers with the changing seasons for a fresh look throughout the year.
Utilizing these tips, you’ll ensure that your DIY Glue Suncatchers become focal points in your home, enchanting everyone who sees them!
Additional Tips
- Experiment with Colors: Don’t be afraid to mix and match different colors for vibrant suncatchers. A rainbow effect is particularly eye-catching.
- Use Different Shapes: Try using cookie cutters to create themed suncatchers such as stars, flowers, or animals. This adds a playful touch to your designs.
- Add Natural Elements: Incorporate dried flowers, leaves, or small twigs into your suncatcher for a natural vibe.
- Create Themes: Design suncatchers based on holidays or special events to enhance your décor throughout the year.
- Involve the Kids: Let children choose their colors or shapes to increase their engagement in the craft.
Recipe Variation
Explore these variations to make your DIY Glue Suncatchers even more exciting:
- Mosaic Style: Use small pieces of colored paper or tissue paper to create mosaic patterns within your suncatcher.
- Glow-in-the-Dark: Add a few drops of glow-in-the-dark paint to your colored glue for a fun twist that shines at night.
- Layered Designs: Create multiple layers with different colors of glue and allow each to dry before adding another layer for depth.
- Glitter Galore: For extra sparkle, coat your suncatcher with glitter after the glue has dried, giving it an enchanting shimmer.
Freezing and Storage
- Storage: Keep your completed suncatchers in a cool, dry place. If carefully handled, they can last for several months without damage.
- Avoid Moisture: Make sure to keep them away from humidity, as moisture can weaken the glue and distort the designs.
- Long-Term Storage: If you want to preserve your creations, consider using a storage container to protect them from dust and breakage.
Special Equipment
To successfully create your DIY Glue Suncatchers, gather the following items:
- A sturdy table or workspace to work on
- A microwave-safe bowl if you choose to warm the glue slightly for easier spreading
- A sponge or brush for applying textures
- A selection of molds or templates for shaping your designs, if desired
- String or fishing line for hanging if you want to create mobile-style suncatchers
Frequently Asked Questions
How long does it take for the suncatchers to dry?
Typically, DIY Glue Suncatchers take about 4-6 hours to dry. However, letting them dry overnight yields the best results.
Can I use different types of glue?
While clear school glue works best for beginners, you can experiment with other types of glue, like gel or craft glue, for different textures and effects.
Can these suncatchers withstand outdoor elements?
It’s best to hang suncatchers indoors as exposure to sun and weather may deteriorate their appearance.
What if my suncatcher doesn’t peel off easily?
If stuck to the wax paper, gently wiggle the edges with a craft knife or your fingers to free it. If still difficult, it may need more drying time.
Can adults enjoy making suncatchers too?
Absolutely! DIY Glue Suncatchers can be a therapeutic and creative outlet for adults, making it a fun group or solo activity.
Conclusion
DIY Glue Suncatchers are not only a delightful way to bring life and color to your windows, but they also serve as an excellent crafting project for all ages. With easy-to-follow instructions and endless customization options, it’s a fantastic way to encourage creativity in everyone. These suncatchers can turn any ordinary space into a vibrant display of art that catches the sunlight beautifully. So gather your materials, get creative, and watch as your unique designs brighten up your home!