DIY Glowing Moon Rocks: Crafting Your Own Celestial Treasures
Hello fellow crafters! Today, I’m thrilled to share an enchanting project that’s been lighting up my world—DIY Glowing Moon Rocks. These mesmerizing creations are perfect for adding a magical ambiance to any space, whether it’s a cozy reading nook or a vibrant garden. And let's be honest—the idea of crafting your very own glowing celestial decorations is just downright fun!
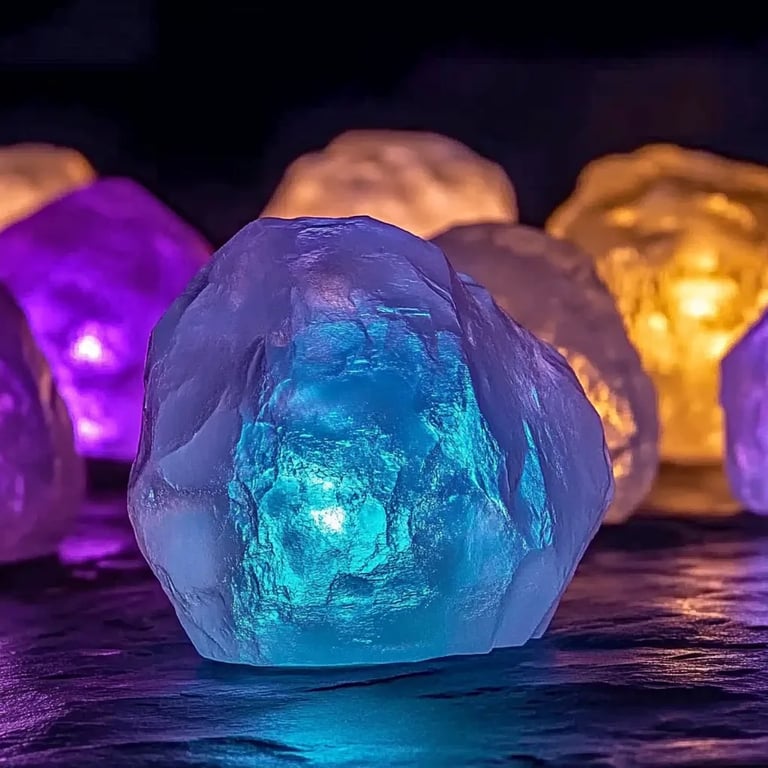
Why We Love Glowing Moon Rocks
So, what exactly are Moon Rocks? Picture this: small, textured stones that glow with an ethereal light when darkness falls. They are not only beautiful but also versatile since they can be used in various settings—think whimsical outdoor parties, serene meditation spaces, or as unique gifts. The best part? This DIY project is an affordable way to add a bit of celestial wonder to your life!
The Perfect Time for Glowing Moon Rocks
I’ve found that making and displaying these glowing beauties is particularly lovely during the evening. They create a soft, inviting glow, making them perfect for summer nights outdoors or winter evenings by the fire. You might even enjoy them on a mantle or as a nightlight in children’s bedrooms.
What You’ll Need
Before we dive into crafting, let’s gather our supplies. This project is not only fun but also requires simple materials you might already have at home. Here’s what you’ll need:
- Smooth, small rocks (also known as river rocks; you can find these at craft stores or in nature)
- Glow-in-the-dark paint (available at craft stores; you can also use glow powder mixed with a clear adhesive medium)
- Paintbrushes
- Waterproof sealant spray (optional, but recommended for outdoor use)
- Newspaper or a drop cloth (to protect your workspace)
- Gloves (for easy handling of paint)
- A bowl or plate for mixing paints (if you're using glow powder)
- A small container for mixing
- Optional: Acrylic paint (for base colors if you want a more colorful look)
Step-by-Step Guide to Making Your Glowing Moon Rocks
Step 1: Clean Your Rocks
First, I recommend giving your rocks a good rinse with water to remove any dust or debris. This is a crucial step since clean surfaces allow the paint to adhere better and glow more vibrantly.
- Tips: Use an old toothbrush to scrub off any stubborn dirt. Dry them thoroughly with a towel before moving on.
Step 2: Base Coat (Optional)
If you wish, you can apply a base coat of acrylic paint to your rocks to give them a colorful backdrop. For example, a deep blue or rich teal can enhance the glowing effect of the glow-in-the-dark paint.
- Why This Matters: A base coat can help the glow paint pop and be more visually striking during the day.
- Fix It: If the base coat is too streaky, go over it with another layer once it’s dry!
Step 3: Apply Glow-in-the-Dark Paint
Once your base coat has dried (if you are using one), it’s time for the magic! Using your paintbrush, coat your rock(s) with glow-in-the-dark paint. Ensure you apply an even layer; for best results, you may need two coats.
- Why This Matters: The thickness of the paint affects how well the rocks will glow. A thicker layer captures more light.
- Tips: Work in small sections to maintain your brush’s effectiveness, and don’t forget to paint the edges for a more finished look.
Step 4: Allow to Dry
Let your painted rocks dry completely in a warm, dry area. This can take anywhere from 1-4 hours depending on the paint brand and humidity.
- What Could Go Wrong: If the rocks are not dried properly, the paint can smudge, which is frustrating!
- Fix It: If you accidentally touch a wet rock, simply clean the area up with a damp sponge swiftly before it dries.
Step 5: Add a Sealant (Optional)
If you plan to use these rocks outdoors, I highly recommend applying a waterproof sealant spray. This extra layer of protection will help maintain the glow-in-the-dark effect and protect against the elements.
- How to Apply: Spray in a well-ventilated area, following the manufacturer’s instructions.
Step 6: Charge the Glow
Before you can enjoy your glowing moon rocks, it’s essential to “charge” the glow. Place them in direct sunlight or under a bright lamp for a few hours to store energy from the light.
Step 7: Illuminate Your Space
Finally, turn off the lights and watch your creations glow! You might want to experiment with placing them in different spots around your home or garden to see where they shine the best.
Creative Variations
Now that you’ve mastered the basics, why not add a twist to your moon rocks? Here are some playful variations I’ve enjoyed:
- Add Glitter: Mix a small amount of fine glitter into your glow paint for an extra sparkle.
- Use Different Colors: Layer various glow-in-the-dark paints to create ombre effects or patterns.
- Themed Décor: Create a set of moon rocks that follow a theme, like Halloween or festive seasons, using colored paints.
Safety Notes
Always wear gloves when handling paints, especially glow-in-the-dark paints, as they can contain chemicals that may irritate your skin. Work in a well-ventilated area to avoid inhaling fumes.
Final Thoughts
Crafting DIY Glowing Moon Rocks has been such a rewarding journey for me, and I hope you find joy in creating them as well. Whether you’re displaying them indoors or outdoors, these luminous treasures can transform any space into a wonderland. Remember that crafting is all about exploration—don't hesitate to make this project your own. I can't wait to hear about your glowing creations! Happy crafting!