DIY Glitter Jar: An Incredible Ultimate Guide to 5 Amazing Sparkles
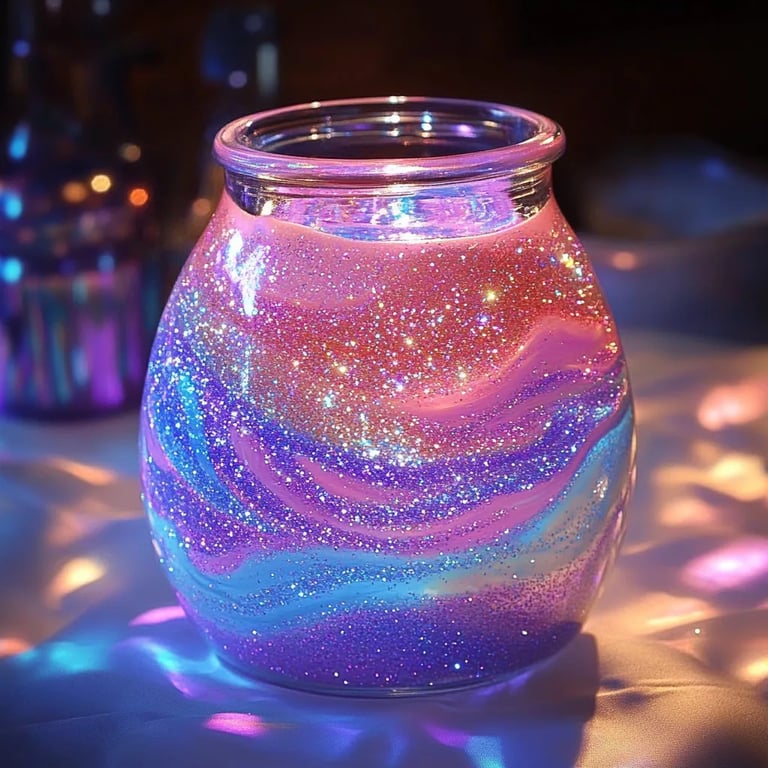
DIY Glitter Jar is a wonderful project that captures your creativity while adding a splash of color and magic to your home. These sparkling jars are not just visually stunning but provide a delightful kaleidoscope of shimmering effects. You’ll find that making a DIY glitter jar is an easy and engaging craft anyone, from kids to adults, can enjoy. This article will take you through the inspirations, necessary materials, and step-by-step instructions to create your very own glitter jar.
Imagine a tranquil evening where the soft glow of your DIY glitter jar illuminates the room as you unwind after a long day. The gentle movement of gel and glitter not only creates a captivating sight but also serves as an excellent tool for relaxation and mindfulness. It’s perfect for stress relief and can double as a lovely decor piece for your living space. This DIY project offers limitless possibilities in terms of colors, shapes, and sizes, ensuring there's something for everyone.
Moreover, a DIY glitter jar can be an excellent gift idea. Whether it’s for a birthday, an anniversary, or just a thoughtful gesture, crafting a personalized glitter jar shows you care. It’s an experience that nurtures creativity, patience, and joy, and the finished product provides an amazing sensory experience that people of all ages can appreciate.
Join me as we dive deeper into why you'll fall in love with this glittery creation, explore the preparation time involved, and gather all the essential ingredients to bring your glitter jar to life. Let’s spark that creativity and get started!
Why You'll Love This DIY Glitter Jar
A DIY glitter jar is not only fun to make; it also has multiple benefits that make it a favorite among crafters. Here are some reasons why you will love this project:
- Simple and Fun – The process is straightforward, making it perfect for crafters of all skill levels.
- Customization – You can easily tailor the colors and themes to fit any occasion or personal style.
- Stress Relief – Watching the glitter swirl in the jar can be mesmerizing and provides a calming effect.
- Great for Kids – It’s an engaging activity that encourages kids to express their creativity while learning about mixing colors.
- Budget-Friendly – Most materials are low-cost and can often be found around your home.
- Decorative Accent – Once completed, your DIY glitter jar will serve as a beautiful piece of decor for your living space.
With these benefits in mind, it’s easy to see why DIY glitter jars have gained popularity. Not only do they bring beauty and whimsy to your environment, but they also provide a sense of accomplishment and relaxation in the crafting process.
Preparation and Cooking Time
Creating your own DIY glitter jar is a quick and enjoyable experience. Here’s an overview of the time you'll need to dedicate to this project:
- Preparation Time: 15 minutes
- Crafting Time: 30 minutes
- Setting Time: 1 hour (optional, for settling and observing the effects)
Overall, you can expect to spend about 45-60 minutes actively putting your glitter jar together. The actual setting time may vary, depending on how long you wish to observe the settling process before showcasing your completed work.
Ingredients
Gather the following materials to begin creating your DIY glitter jar:
- 1 jar (Mason jar or any clear container with a tight seal)
- 1 cup of water
- 2 tablespoons of clear glue or school glue
- 1-2 tablespoons of glitter (choose your favorite colors)
- Food coloring or liquid watercolor (optional for color)
- A mixing tool (like a stick or spoon)
- Warm water (to help dissolve glue)
Step-by-Step Instructions
Creating your own DIY glitter jar is a simple, step-by-step process. Follow these instructions for an astounding result:
- Prepare the Jar: Clean your jar thoroughly, ensuring it is free from any labels. A clean jar ensures a better view of the glitter movements.
- Mix the Glue: In a mixing bowl, combine 1 cup of warm water with 2 tablespoons of clear glue. Stir until the glue is well dissolved and the mixture is homogeneous.
- Add Glitter: Mix in 1 to 2 tablespoons of glitter. Feel free to experiment with multiple colors for a dazzling effect!
- Incorporate Color: If desired, add a few drops of food coloring or liquid watercolor to give your jar a colored tint, and stir thoroughly.
- Fill the Jar: Pour the glitter mixture into the jar, filling it about two-thirds full.
- Top with Water: Add more water to fill the jar, leaving a little space at the top for the jar to seal.
- Seal the Jar: If your jar has a lid, screw it on tightly. If not, you might want to use a strong adhesive or seal to prevent any spills.
- Shake and Enjoy: Give your jar a gentle shake to distribute the glitter, and watch as it swirls and settles.
Feel free to adjust the quantities of glue, glitter, and water based on the effect you want. Different ratios can create various visual experiences in your jars.
How to Serve
Serving your DIY glitter jar is all about presentation and usage. Here are some ideas to enhance your glitter jar experience:
- Display: Place your glitter jar on a shelf, desk, or bedside table as a beautiful decorative accent that adds ambiance to any room.
- Gift: Give your completed glitter jar as a thoughtful, personalized gift for birthdays, holidays, or as a 'just because' present.
- Mindfulness Tool: Use the jar for relaxation by engaging in mindfulness practices. Simply watch the glitter settle while focusing on your breath to promote calmness.
- Party Favors: Create smaller versions of glitter jars as unique party favors for kids' birthdays or community events, allowing each child to take home a piece of the fun.
By following these steps, your DIY glitter jar will not only be a project you can proudly show but will also enhance the environment around you with its mesmerizing beauty. Enjoy every moment of the creation process and the pleasant glow your jar brings!
Additional Tips
- Experiment with Glitter Types: Different types of glitter can create unique visual effects. Try using fine glitter for a softer look or chunky glitter for more dramatic results.
- Use Clear Glue: For the best appearance, stick with clear glue. It helps keep the water clear and allows the glitter to shine.
- Add Essential Oils: If you want your DIY glitter jar to have a pleasant scent, consider adding a few drops of essential oils. Lavender or eucalyptus can enhance the relaxation experience.
- Layering Colors: When adding glitter, try layering different colors on top of one another to create a multi-dimensional effect when they settle.
- Tight Sealing: Ensure your jar is tightly sealed to prevent leaks. A secure jar will allow for easy shaking and a lasting display.
Recipe Variation
Feel free to personalize your DIY glitter jars! Here are some fun variations to consider:
- Seasonal Themes: Design jars for different seasons or holidays using respective colors and glitters. For example, use greens and reds for Christmas, or pastel shades for spring.
- Themed Jars: Create jars that celebrate your favorite movies, books, or hobbies. Use colors and decorations that symbolize those themes.
- Glow-in-the-Dark: Experiment with glow-in-the-dark paint or glitter for a nighttime effect. Your jar can then illuminate dark spaces with a soft glow.
- Ocean-Inspired: Use blue and green colors with shells or starfish figurines to create a beach ambiance. This theme is ideal for summer decor.
Freezing and Storage
- Storage: Once you have created your DIY glitter jar, place it in a cool, dry area away from direct sunlight. This will help maintain the clarity of the water and the vibrancy of the glitter.
- Avoid Temperature Fluctuations: Do not expose your jar to extreme temperatures, as this may affect the ingredients and possibly cause separation.
Special Equipment
You don't need much fancy equipment to create your DIY glitter jar. However, here are a few tools that can help:
- Mixing Bowl: A small bowl works great for mixing the glue and water.
- Stirring Stick: Use a stick or a spoon for stirring the mixture. Make sure it's clean and free of residues.
- Funnel: A funnel can help pour the mixture into the jar without spills.
Frequently Asked Questions
How do I prevent the glitter from clumping?
Ensure that the glue is fully dissolved before adding glitter. Stir well to distribute the glitter evenly throughout the jar.
Is it safe for kids to make this project?
Yes! Supervise younger children to avoid spills and ensure they are using materials safely. Older kids can safely enjoy the crafting experience.
What if my jar leaks?
If you notice any leaks, double-check the sealing on your jar. You can also apply additional glue or a strong adhesive around the rim for extra protection.
Can I use anything other than a jar?
Certainly! Any clear container with a lid can work. Just ensure it allows you to see the glitter effect clearly.
What happens if the glitter settles to the bottom?
It’s normal for some glitter to settle. You can always shake the jar gently to redistribute the glitter and observe an entirely new effect.
Conclusion
Creating a DIY glitter jar is a fantastic way to indulge your creativity while crafting a unique and beautiful piece of decor. Whether used for relaxation, as a gift, or simply to add a touch of sparkle to your surroundings, this project has endless possibilities. By following the simple steps and incorporating your personal flair, you will craft a glitter jar that captivates and charms all who see it. Enjoy the blissful experience of watching the glitter dance, and let yourself be transported into a world of enchantment every time you shake your jar!