DIY Gel Air Fresheners: An Amazing Ultimate Guide for Your Home
DIY Gel Air Fresheners can transform the ambiance of any space. The process of creating your own air fresheners not only provides delightful fragrances but also allows you to control the ingredients, making them a healthier alternative to store-bought options. Simple, easy, and cost-effective, this DIY project can be both therapeutic and rewarding. The ability to customize scents and designs makes it a wonderful activity for families and individuals alike.
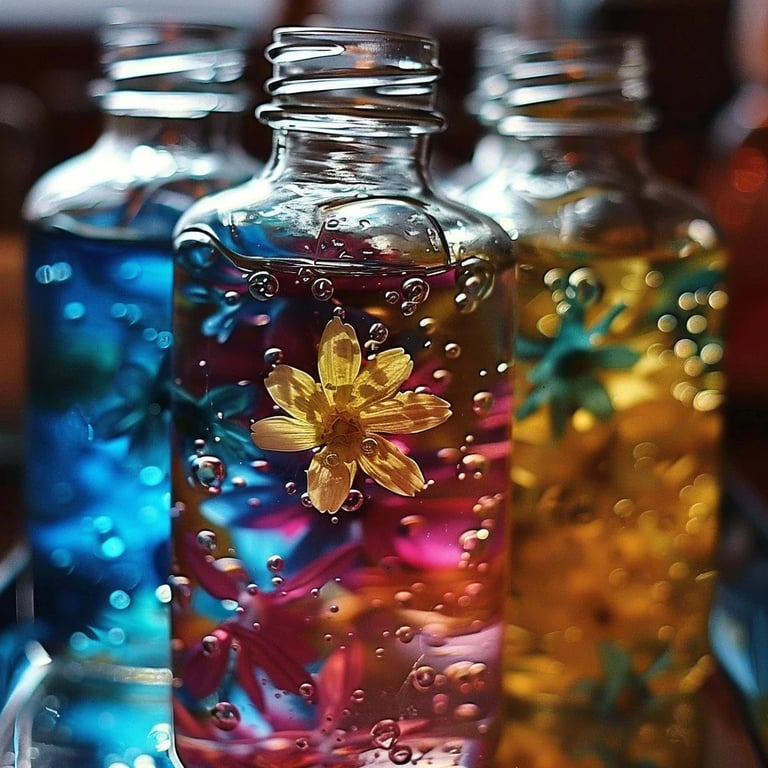
If you’ve ever walked into a room that smells stale or unpleasant, you’ll know how important it is to have fresh air in your living spaces. The amazing aspect of DIY Gel Air Fresheners is that they can be made with natural ingredients and your favorite essential oils. If you've never tried making your own air freshener, you'll be amazed at how simple it is. This guide will lead you through why making your own gel air fresheners is an excellent idea, what you need to make them, and step-by-step instructions for creating these refreshing, fragrant gels.
Let’s dive into the wonderful world of DIY Gel Air Fresheners and discover how they can enhance your home environment!
Why You’ll Love This Recipe
Making your own DIY Gel Air Fresheners offers numerous benefits. Here are some compelling reasons to get excited about this project:
- Custom Scents: Create unique fragrances that reflect your personality. Mix and match essential oils for personalized blends.
- Chemical-Free: By using natural ingredients, you avoid harmful chemicals found in many commercial air fresheners.
- Affordable: Creating your own air fresheners is highly economical compared to purchasing pre-made options.
- Creative Expression: Decorate your gel air fresheners in various jars or molds, adding a creative touch to your home decor.
- Great Gifts: Handmade gel air fresheners can make thoughtful gifts for friends and family.
- Sustainable: Reduce waste by using recyclable jars and eco-friendly ingredients.
These points illustrate why DIY Gel Air Fresheners are increasingly popular among those looking for sustainable and fun home solutions.
Preparation and Cooking Time
Creating DIY Gel Air Fresheners will require about 30-45 minutes in total. Here’s a breakdown:
- Preparation Time: 10-15 minutes
- Cooling Time: 20-30 minutes
This easy timeframe ensures you can produce multiple air fresheners in one session!
Ingredients
- 1 cup of distilled water
- 1 tablespoon of unflavored gelatin
- 1 tablespoon of coarse salt (preservative)
- 10-15 drops of essential oils (your choice)
- Food coloring (optional)
- Small jars or containers for storage
Step-by-Step Instructions
Creating your own DIY Gel Air Fresheners is a straightforward process, and following these steps will guide you through it:
- Prepare for Mixing: Gather all ingredients and tools. Prepare your workspace.
- Heat Water: In a saucepan, heat 1 cup of distilled water over medium heat until it is nearly boiling.
- Add Gelatin: Gradually whisk in 1 tablespoon of unflavored gelatin until it dissolves completely.
- Add Salt: Stir in 1 tablespoon of coarse salt, which acts as a preservative to keep the gel fresh.
- Mix in Oils: Remove from heat and add your 10-15 drops of essential oils for fragrance. Adjust based on your scent preference.
- Color It (Optional): If desired, add a few drops of food coloring to tint the gel and make it visually appealing. Mix well.
- Pour into Jars: Carefully pour the mixture into small jars or containers. Leave some space at the top for air circulation.
- Cool Down: Allow the jars to sit at room temperature until the mixture sets completely, approximately 20-30 minutes. Optionally, you can place them in the refrigerator to speed up the setting process.
- Decorate (Optional): Once set, you may choose to decorate the jars with labels or ribbons for a polished look.
These clear steps outline how easy it is to create homemade gel air fresheners!
How to Serve
Once you’ve completed your DIY Gel Air Fresheners, here are some suggestions on how to maximize their use and enjoyment:
- Placement: Position the jars in areas where air flow is optimal, like on shelves, in bathrooms, or near windows.
- Frequent Use: Shake gently or stir the gel occasionally to reignite the fragrance release.
- Mix and Match: Create a harmonious scent theme throughout your home by using similar oils in different areas.
- Gifting: Place your DIY Gel Air Fresheners in gift bags for housewarming parties or seasonal celebrations.
- Seasonal Scents: Rotate scents based on seasons; for instance, citrus oils for summer and cinnamon for winter.
By following these serving tips, you can enhance the experience of your DIY Gel Air Fresheners and share their charm with others!
With these insights and steps, you're prepared to make innovative DIY Gel Air Fresheners that will uplift your home while ensuring a healthy environment free from chemicals. So gather your ingredients and start creating!
Additional Tips
- Experiment with Essential Oils: Different essential oils can evoke various moods. Lavender is calming, while citrus can energize.
- Use a Fixative: You can add a few drops of vanilla extract or witch hazel to help the scent last longer.
- Refreshing Scents: For a more refreshing scent, consider adding crushed herbs, like mint or rosemary, to the mixture.
Recipe Variation
Feel free to get creative with your gel air fresheners! Here are a few variations:
- Citrus Blend: Use lemon, lime, and orange essential oils for a zesty, cheerful aroma.
- Spice It Up: Combine cinnamon, clove, and nutmeg oils for a cozy holiday scent.
- Floral Delight: Blend rose and jasmine essential oils for a romantic fragrance.
Freezing and Storage
- Storage: Keep your gel air fresheners in a cool, dry place. They should last for about 2 to 3 weeks.
- Freezing: While not typically necessary, you can freeze the gel if you want to prepare large batches ahead of time. They may slightly alter in texture but will still work effectively.
Special Equipment
You’ll need a few essential items for crafting your DIY Gel Air Fresheners:
- Saucepan for heating the water
- Whisk for mixing the ingredients
- Measuring cups and spoons for accuracy
- Small jars or containers for storage
- Funnel for easy pouring (optional)
Frequently Asked Questions
Can I use any type of essential oil?
Yes, as long as it’s skin-safe and intended for aromatherapy. Some oils are not suitable for air fresheners.
How often should I replace my DIY gel air fresheners?
Replace them every few weeks or when the scent weakens significantly.
What if I don’t have essential oils?
In a pinch, you can use natural extracts like vanilla or peppermint, but they might not be as potent.
Can I reuse the jars?
Absolutely! Just clean them thoroughly with soap and water before making a new batch.
Are these gels safe for pets?
Some essential oils can be harmful to pets. Always consult your vet before using particular oils around pets.
Conclusion
Creating DIY Gel Air Fresheners is a delightful way to improve your home’s fragrance while keeping things natural and safe. The joy of customizing your scents and designs allows for creativity and personal expression. Whether you're looking to create a calming atmosphere or a lively space, these gel air fresheners can fulfill your needs. Enjoy crafting them and transforming the air in your home!