DIY Bouncing Bubbles: The Ultimate Guide to Creating Magical Fun at Home
Hello fellow crafters! Today, I’m excited to share one of my absolute favorite experiments—making DIY bouncing bubbles! If you're like me, you probably have fond memories of chasing after iridescent bubbles, but what if I told you there’s a way to make bubbles that actually bounce instead of popping? Yes, you heard it right! Bouncing bubbles are not only a delightful twist on the classic bubble experience, but they also provide a fantastic opportunity for imaginative play and can add a dash of magic to any gathering, whether it's a birthday party, family event, or a simple day in the backyard.
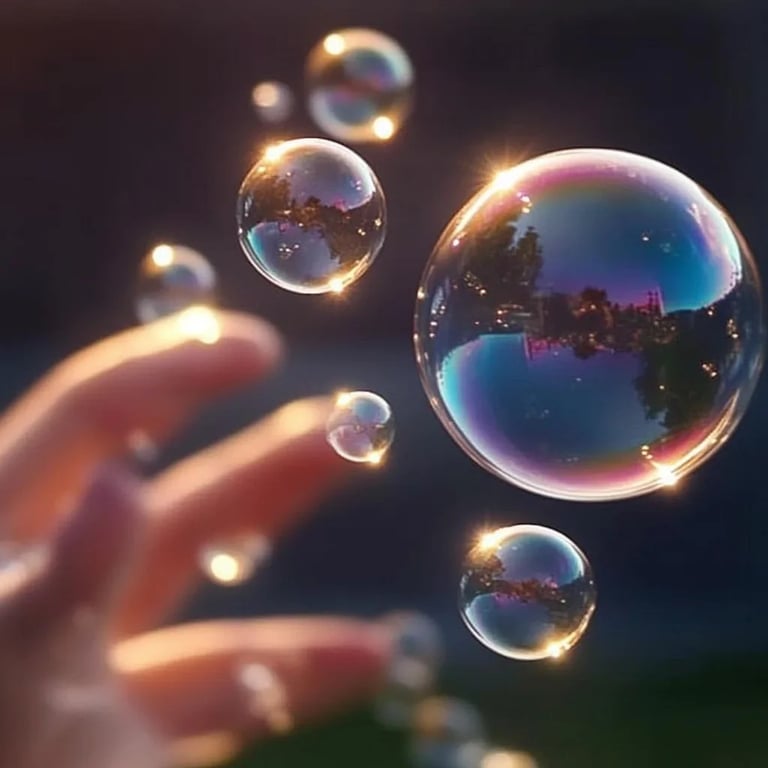
Why Bouncing Bubbles?
Bouncing bubbles are popular because they stretch the limits of our typical expectations of bubbles. They act as a wonderful sensory experience for children and adults alike, fostering creativity and curiosity. Plus, they’re just plain fun! You can use them for playful games, art projects, or simply to entertain guests. The beauty of bouncing bubbles lies in their unique composition, which allows them to maintain their shape longer than traditional soap bubbles. So, let’s dive in and get those creative juices flowing!
Materials You'll Need
Before we start bubbling away, let’s gather our materials. You likely have most of these items at home, making this project super accessible!
- 1 cup of water – Distilled water works best, but tap water is fine if that’s what you have.
- 2 tablespoons of glycerin – This ingredient is key for creating those bouncing properties. Glycerin can be found at most drugstores or ordered online.
- 1 tablespoon of cornstarch – It acts as a thickener and helps to create a stronger bubble.
- Mixing bowl – To combine all your ingredients.
- Whisk or spoon – For mixing.
- Bubble wand – You can purchase one or make your own using a pipe cleaner or a loop of string.
- A flat surface – Outdoor, or a place with minimal wind is ideal.
The Step-by-Step Process
Step 1: Mix Your Ingredients
Start by pouring 1 cup of water into your mixing bowl. Next, add the cornstarch and stir until it dissolves completely. This step is vital; if the cornstarch isn’t fully mixed in, it might create clumps in your bubble solution.
Pro Tip: If you find lumps after mixing, simply let it sit for a few minutes and then whisk again.
Next, add the glycerin to the mixture. Glycerin helps enhance the elasticity of the bubbles, allowing them to bounce instead of popping. Gently stir until you have a well-combined solution. It should have a slightly sticky consistency.
Common Mistake: Not using enough glycerin can result in easily popped bubbles. If your bubbles aren’t bouncing, consider adding a bit more glycerin next time.
Step 2: Let the Mixture Rest
After mixing everything together, allow your solution to sit for about 30 minutes. This resting period helps all the ingredients fully integrate and enhances bubble quality. You can cover it with a dish towel or plastic wrap to prevent any dust from settling in.
Step 3: Create Your Bubble Wands
While we wait, let’s make some bubble wands! If you have a store-bought bubble wand, that’s fantastic! Alternatively, I love making my own with craft materials. Simply bend a pipe cleaner into a loop and twist it around to secure it. For a string-based wand, tie a loop of string to two sticks, making sure there’s enough space for the soap to slide through.
Creative Variation: Try making different shapes (like hearts or stars) with your wand for visually appealing bubbles.
Step 4: Start Blowing Bubbles
Once your mixture has rested, it’s time for the fun part! Dip your wand into the bubble solution until it's fully saturated. Hold it up, give a gentle blow, and watch the magic happen.
Tip: The type of blow matters! Gentle, consistent pressure often creates larger, bouncier bubbles. If your bubbles are popping too quickly, you may be blowing too hard or the environment may be too dry.
Step 5: Bounce Your Bubbles
Now for the best part: making them bounce! To experience bouncing bubbles, approach them softly with your hand and gently catch them. You’ll notice that they have a stretchy quality, allowing them to bounce off surfaces without bursting.
*Safety Warning:* Always supervise children while playing with bubbles to prevent slipping on wet surfaces.
Troubleshooting Common Issues
- Bubbles Keep Popping: This can happen if your solution is too watery or if you’re not using enough glycerin. No worries! Simply add a little more glycerin to thicken the solution.
- Bubbles Won't Form: If your bubbles seem too weak or small, ensure that the cornstarch is fully dissolved and that your ingredients are fresh.
- Too Windy: If you’re working outdoors and it’s windy, bubbles will pop quicker and will be harder to catch. Try finding a sheltered spot.
Alternative Ingredients
If you’re in a pinch and don’t have glycerin, you can substitute it with corn syrup. While it won’t give exactly the same results, it can still produce fun bubbles. Simply replace glycerin with an equal amount of corn syrup in the solution.
Personal Anecdotes
I vividly remember hosting a summer gathering with friends, and after unleashing our bouncing bubble creations, we found ourselves engaged in a full-on bubble battle! It turned out to be one of the highlights of our day. We laughed, chased, and even tried creating the largest bubble possible. It’s those memories that remind me how something so simple can create joy!
Final Thoughts and Encouragement
Making DIY bouncing bubbles is not only a fun project but also a fabulous bonding activity with family and friends. Remember, crafting is all about experimentation. Don’t be afraid to tweak the recipe, try different bubble wands, or even explore flavors by adding a tiny bit of food coloring for a vibrant touch!
The world of DIY is full of possibilities, and I hope this guide inspires you to create your very own bouncing bubble adventure. So, gather your materials, let your creativity flow, and enjoy every moment spent crafting these magical little droplets of joy. Happy bubbling!