DIY Beaded Leaf Plant in a Terra Cotta Pot: An Incredible Ultimate Guide
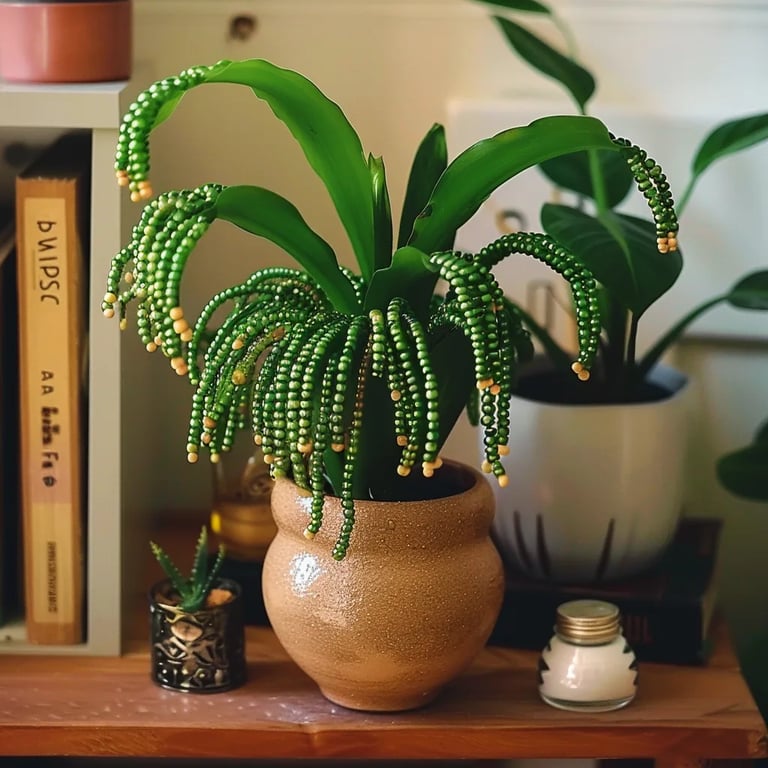
DIY Beaded Leaf Plant in a Terra Cotta Pot is an amazing craft project that combines creativity and nature. It enables you to bring a touch of greenery into your home without the need for traditional gardening. By using beaded leaves, you can create a beautiful plant that never wilts and requires minimal maintenance. This craft is perfect for anyone looking to enhance their decor with a unique handmade piece.
The beauty of a DIY Beaded Leaf Plant lies not just in its aesthetics but also in the joy of creating something from scratch. Coupled with a terra cotta pot, it becomes a delightful centerpiece that can brighten up any room. Imagine glancing at this stunning creation, knowing that it was crafted with your own hands. It embodies a sense of accomplishment and creativity that resonates deeply. This guide is designed to walk you through every step, from gathering supplies to creating your masterpiece.
With endless possibilities for customization, you can express your personal style in every creation. Whether you prefer vivid colors or subtle earth tones, this project can cater to your preferences, making it a wonderful option for gifting or self-indulgence. Before diving into the crafting process, let's explore why this DIY project is worth your time and effort.
Why You’ll Love This DIY Project
Creating a DIY Beaded Leaf Plant in a Terra Cotta Pot offers numerous benefits that you’ll surely appreciate. Here are some compelling reasons why this project is so special:
- Artistic Expression: This project allows you to unleash your creativity. Choose colors, patterns, and styles that resonate with your artistic vision.
- Low Maintenance: Unlike real plants, your beaded creation won’t require watering or sunlight. It’s perfect for those with busy lifestyles or limited access to natural light.
- Durability: Made from durable materials, your beaded plant can withstand the test of time, maintaining its beauty without wilting or fading.
- Fun Family Activity: This craft is suitable for all ages, making it a fantastic family activity to bond over. Children can also join in and learn motor skills.
- Unique Home Decor: Your creation can serve as a conversation starter in your home. Each piece will be unique to your design choices, showcasing your personal flair.
- Thoughtful Gifts: Consider giving a DIY Beaded Leaf Plant as a gift. It’s a unique gesture that goes beyond a typical store-bought gift.
- Therapeutic Benefits: Crafting can be a relaxing activity. Engaging in this project can help alleviate stress and promote mindfulness.
With these reasons in mind, it’s clear that creating a DIY Beaded Leaf Plant in a Terra Cotta Pot is an enjoyable and fulfilling endeavor.
Preparation and Crafting Time
Before you start crafting, it’s essential to allocate enough time to complete your project. Here’s a breakdown of the expected time commitment involved:
- Preparation Time: 10-15 minutes (for gathering materials)
- Crafting Time: 1-2 hours (depending on complexity and detail)
- Final Touches: 10-15 minutes (for arranging and displaying)
Overall, you’ll find that dedicating a few hours to this project is not only worthwhile but also incredibly satisfying.
Materials Needed
Gathering the right supplies is crucial for a successful DIY Beaded Leaf Plant. Here’s a comprehensive list of materials you’ll need:
- Terra cotta pot (small to medium size)
- Floral foam or stones (for pot stability)
- Green wire or floral stems
- Assorted green beads (for leaves)
- Wire cutters
- Craft glue (optional)
- Strong adhesive (for securing materials)
- Scissors
- Decorative ribbon (optional)
Once you have all your materials ready, you can proceed to the next phase: crafting your beautiful plant.
Step-by-Step Instructions
Creating your own DIY Beaded Leaf Plant in a Terra Cotta Pot is a straightforward process. Follow these simple steps:
- Prepare the Base: Start with the terra cotta pot and insert floral foam or stones inside it to provide stability for the plant.
- Cut the Wire: Using wire cutters, cut several pieces of green wire to your desired length. These will act as the stems for your leaves.
- Create Beaded Leaves: Begin threading your chosen green beads onto each wire piece. You can create a single leaf by adding one to three beads, depending on your desired style.
- Secure the Beads: Twist the end of the wire to hold the beads in place. You can use craft glue if you want extra security.
- Attach Leaves to Stems: Insert the beaded wires into the floral foam or stones in your pot. Arrange them in a way that looks natural and visually appealing.
- Add More Leaves: Continue adding more beaded leaves until you achieve your desired fullness and style.
- Finalize Arrangement: Step back and check your arrangement. Make adjustments as necessary to ensure that it looks balanced and lovely.
- Decorate the Pot: If desired, add a decorative ribbon around the rim of the pot or paint it for an added touch of personality.
- Display Your Creation: Place your finished plant in a suitable location, such as a sunny window shelf or a table, to show it off.
By following these steps, you will create a stunning DIY Beaded Leaf Plant that enhances your home decor.
How to Serve
Once you have successfully crafted your DIY Beaded Leaf Plant, it’s time to think about serving it in your home. Here are some ideas on how to create an inviting display:
- Choose the Right Location: Position your plant where it will get attention, such as a living room coffee table or near a window.
- Pair with Other Decor: Place the terra cotta pot alongside other plants or decorative objects to create a cohesive display. Mixing textures and colors can provide visual interest.
- Use as Centerpiece: Use your beaded plant as a centerpiece for special occasions or family gatherings. It can enhance the ambiance of your event.
- Interact With Light: If possible, place it where natural light can highlight the beads, making them sparkle and catch the eyes of your guests.
- Rotate Regularly: Consider rotating the plant’s position from time to time to keep your decor fresh and engaging.
By implementing these serving suggestions, your DIY Beaded Leaf Plant can become a cherished part of your home, bringing joy and creativity to your space every day!
Additional Tips
- Customize Your Beads: Incorporate different bead shapes and sizes for added visual interest. Mix round, teardrop, and unique-shaped beads to create leaves that stand out.
- Experiment with Colors: You can also use beads of various colors to simulate different types of plants. Think reds and yellows for autumn leaves or vibrant hues for a tropical look.
- Secure Stems Well: Make sure to secure the wire stems tightly in the floral foam. This will help maintain the structure of your plant.
- Cleanup As You Go: Crafting can get messy. Keep a cloth or paper towels handy to wipe away excess glue or debris as you work.
- Display Options: Consider using more than one pot for a clustered look. A few smaller pots can create an eye-catching arrangement together.
Recipe Variation
Feel free to explore different styles and techniques with your DIY Beaded Leaf Plant. Consider these variations:
- Use Fabric Leaves: Instead of beads, try using fabric or felt to create leaves. They can be cut into leaf shapes and attached to the wires for a softer look.
- Miniature Version: Create mini versions of your plants for a cute and whimsical display. They make great accents for shelves or desks.
- Seasonal Themes: Change the colors and styles of your beaded leaves based on seasons. Use pastel shades for spring, vibrant greens for summer, and warm oranges for autumn.
Freezing and Storage
- Storage of Supplies: Keep your beads and materials in airtight containers when not in use. This prevents dust and damage and ensures that your crafting supplies remain in great condition.
- Final Product Care: Display your beaded plant in a stable, sheltered location. Avoid exposure to direct sunlight for extended periods, as it may cause the colors to fade.
Special Equipment
Setting up your crafting station will require a few handy tools:
- Wire Cutters: Essential for trimming your wire to the desired lengths.
- Hot Glue Gun: For additional security while attaching beads, but use this sparingly.
- Paintbrush: If you choose to paint your pot, a paintbrush will help you apply an even coat.
- Beading Needle: Helpful if you’re working with very small beads.
- Tweezers: These can assist in placing smaller beads onto the wire.
Frequently Asked Questions
Can I make a larger version of the plant?
Yes, simply use longer wire and a larger pot.
What kind of beads are best?
Plastic, glass, or wood beads can all be great choices depending on the look you want.
How do I clean my beaded plant?
Use a soft cloth to gently wipe away dust. Avoid putting it in water.
Can I change the leaves later?
Absolutely! You can easily remove and replace the beads on your wire stems.
Is this craft safe for children?
Yes, but supervision is recommended, especially when using wire or scissors.
Conclusion
Creating a DIY Beaded Leaf Plant in a Terra Cotta Pot is not just a craft project; it's a journey of creativity and personal expression. With unique designs and endless customization options, this project can bring life to any space. Enjoy the process, explore variations, and take pride in showcasing your handmade plant!