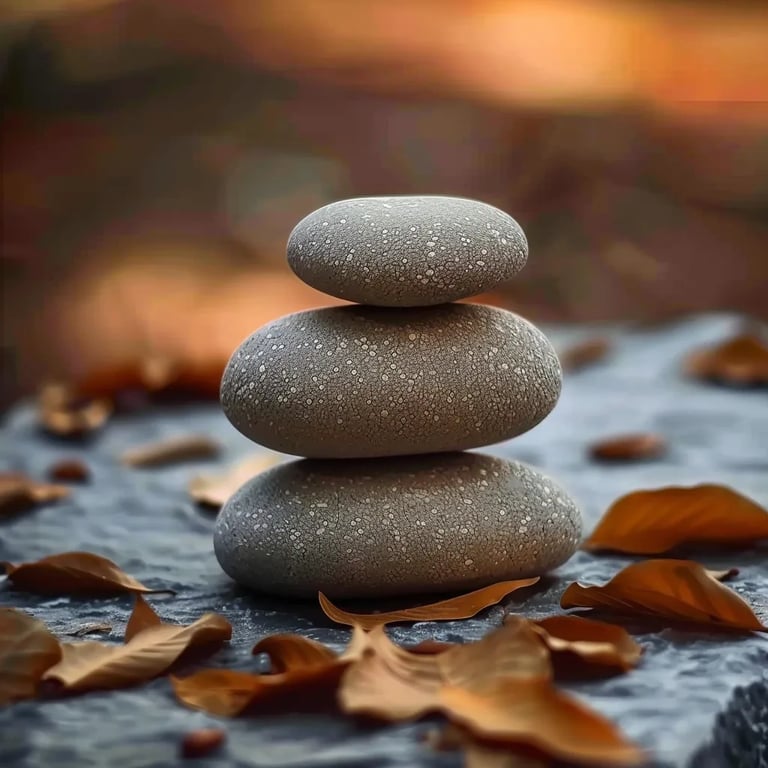
DIY Aroma Stones: An Incredible Ultimate Recipe for Relaxation
DIY Aroma Stones are a wonderful way to bring soothing scents into your home. These charming little creations not only enhance your living space but also add a personal touch to your décor. Once you’ve learned how to make these aroma stones, you’ll discover just how easy and enjoyable it is to infuse your surroundings with delightful fragrances. Whether you want to unwind after a long day or create a calming environment for guests, DIY Aroma Stones are your secret weapon.
The art of crafting your own aroma stones offers not just practicality but also a wonderful sensory experience. The process involves simple ingredients, making it accessible to everyone. Understanding the benefits of essential oils and how scents can impact your mood enhances the experience further. In this guide, you’ll learn everything you need to know about making DIY Aroma Stones, from the ingredients to step-by-step instructions. Let’s dive into the world of beautiful aromas designed to uplift your spirit.
You’ll be amazed at how simple it is to create these stones. Not only do they make perfect gifts, but they also serve as lovely decorations. The adaptability of this project allows you to choose your favorite scents and personalize it to reflect your style. It’s not just a craft; it’s a creative outlet where you get to play with different colors and fragrances. Everyone you share your aroma stones with will be captivated by their beauty and inviting fragrance.
Why You’ll Love This Recipe
DIY Aroma Stones provide myriad benefits, and here are several reasons why you’ll absolutely love making them:
- Simple to Create – Anyone can make these stones; no prior crafting experience is required.
- Endless Customization – You can adjust scents, colors, and shapes according to your preference.
- Great Stress Relief – The process and the aromas can help reduce anxiety and stress.
- Personalized Gifts – Your homemade aroma stones make thoughtful gifts for friends and family.
- Eco-Friendly – Using natural ingredients means you’re being kind to the planet.
- Affordable – Creating your aroma stones is budget-friendly compared to purchasing commercial air fresheners.
Each of these factors makes DIY Aroma Stones a fantastic and fulfilling project. Not only do they smell wonderful, but they also allow for self-expression and creativity.
Preparation and Cooking Time
The total time required to create your DIY Aroma Stones is about 1 hour, with preparation and drying. Here’s a quick breakdown:
- Preparation Time: 20 minutes
- Drying Time: 40 minutes to 24 hours (depending on thickness)
These times may vary slightly based on your experience with crafting and the drying environment. Make sure to plan accordingly to achieve the best results.
Ingredients
- 1 cup baking soda
- 1/2 cup cornstarch
- 3/4 cup water
- 10-15 drops of essential oils (your choice)
- Optional: food coloring for visual appeal
- Optional: silicone molds for shaping
Step-by-Step Instructions
Follow these steps to create your own beautiful DIY Aroma Stones:
- Mix Dry Ingredients: In a bowl, combine the baking soda and cornstarch.
- Add Water: Gradually stir in the water, mixing until fully combined.
- Incorporate Scents: Add the essential oils of your choice. Start with 10 drops and add more if you want a stronger scent.
- Color It Up: If desired, add a few drops of food coloring and mix to achieve your preferred color.
- Shape Your Stones: Pour the mixture into silicone molds. You can shape them however you like, such as circles, hearts, or even decorative shapes.
- Dry the Stones: Let the stones dry in a cool, dry area. This can take anywhere from 40 minutes to 24 hours, depending on the thickness of your stones.
- Remove from Molds: Once dry, gently remove the stones from the molds. Take care not to break them.
- Display or Gift: Place the stones around your home or wrap them up as gifts for others.
By following these straightforward steps, you’ll create delightful DIY Aroma Stones that fill your space with soothing fragrance.
How to Serve
To enjoy and share your DIY Aroma Stones effectively, here are some engaging ideas:
- Create Ambiance: Place the stones around your living spaces, such as on side tables, near bath tubs, or in the kitchen, to enhance the overall atmosphere.
- Gift Packaging: Present your aroma stones in beautiful little bags or boxes as heartfelt gifts.
- Mix and Match: Combine different scents in one area for a unique aromatic experience—lavender for relaxation, citrus for energy.
- Home Décor: Use decorative trays or bowls to display your stones, making them a part of your interior design.
- Refresh as Needed: When the scent begins to fade, simply add a few more drops of essential oils to rejuvenate their aroma.
These tips will help maximize the enjoyment of your DIY Aroma Stones, making them not just a craft project, but a sensory experience that enhances your everyday life.
Additional Tips
- Experiment with Scents: Don’t hesitate to blend different essential oils. For example, lavender and vanilla create a calming atmosphere, while eucalyptus and citrus can invigorate your space.
- Test Fragrance Strength: Before finalizing your aroma stones, test the scent's strength. Create a small sample stone and allow it to dry. Adjust the number of essential oil drops based on your preferences.
- Use Natural Colors: If you prefer an eco-friendly approach, try using natural colorants like beet juice or turmeric for coloring your stones.
- Add Decorative Touches: Once your aroma stones are dried, consider painting or adding embellishments. This can make them even more appealing as decor or gifts.
- Consider Seasonal Scents: Tailor your DIY Aroma Stones to the changing seasons. Use cinnamon and clove for fall, peppermint for winter, floral scents for spring, and fresh citrus for summer.
Recipe Variation
Feel free to get creative with different recipes! Here are a few variations to try:
- Herbal Blends: Incorporate dried herbs like rosemary or thyme into your mixture. This will give a unique aroma and add a nice texture.
- Different Oils: Use carrier oils like jojoba or coconut oil before adding essential oils to alter the scent profile.
- Layering Fragrances: Create layered aroma stones by pouring different colored mixtures one after the other. This gives a visually stunning effect.
- Scent Infusion: Instead of solely relying on essential oils, infuse your baking soda with fresh ingredients like lemon peels or dried flowers for added fragrance.
Freezing and Storage
- Storage: Keep your DIY Aroma Stones in an airtight container to preserve their scent and protect them from moisture. They can last up to 4 weeks.
- Freezing: If you want to make a batch but use them later, you can freeze them. Store them in a freezer-safe bag and use them as needed, although their scent might fade over time once thawed.
Special Equipment
To create your DIY Aroma Stones effectively, you will need a few essential tools:
- Mixing bowls
- Measuring cups and spoons
- Silicone molds for shaping
- A spoon or spatula for mixing
- Airtight containers or zip-lock bags for storage
Frequently Asked Questions
Can I use any type of essential oil?
Yes, you can use any essential oil; however, it’s best to use high-quality, pure oils for the best scent and benefits.
How long do the scents last?
Typically, the scent lasts from 2 to 4 weeks, depending on the essential oils used and the environment where the stones are placed.
Are DIY Aroma Stones safe for pets?
Some essential oils can be harmful to pets. Always research or consult with a veterinarian before using certain oils around animals.
Can I use food-grade essential oils?
Yes, food-grade essential oils can be used, particularly if you're creating aroma stones for specific scents that you might want to consume indirectly, like in a potpourri setting.
How can I refresh the scent when it fades?
You can refresh the scent by adding a couple of drops of your chosen essential oil directly onto the stone. Allow it to absorb before placing it back in your space.
Conclusion
Making DIY Aroma Stones is a simple and enjoyable way to enhance your home with delightful scents. Whether you're looking to create a calming atmosphere or to gift something unique, these stones provide both beauty and functionality. As you experiment with scents and colors, you will find endless possibilities for self-expression. With just a few simple ingredients and steps, you can fill your space with the fragrances you love while also showcasing your creativity. So gather your materials, unleash your imagination, and enjoy the process of making your very own DIY Aroma Stones!