Dive into Fun: Creating Underwater Magic Sand
Welcome, fellow DIY enthusiasts! Today, I’m thrilled to share one of my all-time favorite crafts—making Underwater Magic Sand. If you’ve ever wanted to turn your simple beach sand into an enchanting, hydrophobic material that repels water, then you’re in for a treat! Not only is this project a fantastic hands-on experiment for kids, but it's also a brilliant addition to science-themed parties, playdates, and classroom demonstrations. So, let’s get started!
What is Underwater Magic Sand?
Underwater Magic Sand, often referred to as “hydrophobic sand,” is just regular sand treated with a special coating that allows it to repel water and maintain a dry appearance, even when submerged. This intriguing property is due to the addition of a hydrophobic material, which creates a barrier between the sand and water. It’s popular among kids and adults alike because it provides an engaging and educational experience, showcasing the principles of chemistry in a visually stunning way.
You might want to whip up a batch for a summer party, engaging the kids in scientific play, or simply for an afternoon of creativity and discovery at home. Regardless of the occasion, let me walk you through the process step-by-step!
What You’ll Need
Before we jump into the crafting process, let’s gather all the necessary materials. Luckily, most of these can be found around the house or easily obtained from a local store.
Essential Ingredients:
- Fine sand (1 cup) – You can use beach sand, play sand, or even synthetic sand. The finer, the better!
- Hydrophobic material (1/4 cup) – The most common options include:
- Silicone oil or waterproofing spray – These products can be found at hardware stores.
- Cornstarch or hydrophobic powder (like Teflon powder).
- Mixing bowl and spoon – For combining your materials.
- Measuring cup – Precision is crucial!
- Ziploc bag or airtight container – For storing your finished product.
- Water container – For testing your magic sand's properties.
Optional Add-Ons:
- Food coloring – If you want to make your sand more visually appealing!
- Glitter – For a sparkling touch. Who doesn’t love some glitz?
Step-by-Step Tutorial to Make Underwater Magic Sand
Now that we have everything set up, let’s dive into creating your magic sand! Follow these steps carefully to get the best results.
Step 1: Measure Your Sand
Start by measuring out 1 cup of fine sand. This acts as the base for our magic sand. If you’re using beach sand, ensure that it’s clean and free of debris. I usually sift it through a fine mesh to get rid of larger particles.
Tip: If your sand is too coarse, it might not take to the hydrophobic treatment effectively. A fine grain helps it repel water more efficiently.
Step 2: Choose Your Hydrophobic Material
Next, choose between silicone oil or a waterproofing spray. For this instance, let’s use silicone oil for our project, as it’s user-friendly, readily available, and effective.
Step 3: Mix the Sand and Silicone Oil
In your mixing bowl, combine your measured sand with 1/4 cup of silicone oil. It’s time to get your hands dirty! Use your hands or a spoon to thoroughly mix them together. You want to ensure that every grain of sand is coated evenly.
Why It Matters: A well-mixed concoction ensures that the properties of the silicone oil permeate the sand thoroughly, giving you the best hydrophobic results.
Step 4: Let It Sit
Once everything is mixed, let your sand sit in the bowl for around 10-15 minutes. This allows the silicone oil to fully absorb into the sand.
Step 5: Test Your Sand
After the resting period, it’s time for the moment of truth. Fill a container with water and take a handful of your magic sand. Squeeze it into a ball and then submerge it in the water.
What to Look For: The sand should remain dry and crumbly inside! If you find that it gets wet, it may need more silicone oil. Don’t fret! Simply add a few more drops and repeat the mixing process.
Step 6: Store Your Magic Sand
Once you have successfully created your Underwater Magic Sand, it’s crucial to store it properly. Transfer it to a Ziploc bag or airtight container to keep it dry when it’s not in use.
Common Pitfalls and Solutions
1. The Sand Gets Wet
Problem: If the sand absorbs water instead of repelling it, it might be an indication that the silicone oil wasn’t mixed in thoroughly.
- Solution: Add more silicone oil and ensure that it's fully incorporated. You might need to repeat the testing step.
2. The Sand is Too Clumpy
Problem: If clumps form and the sand isn’t flowing well, you may have used too much silicone.
- Solution: Try adding a touch more dry sand to break up the clumps.
3. Too Much Oil
Problem: Using too much silicone oil can make the sand feel greasy.
- Solution: Mix in more dry sand to balance out the excess oil.
Creative Variations
Now that you’re a pro at making Underwater Magic Sand, let’s explore some creative variations to add your personal touch!
1. Colorful Magic Sand
Add food coloring to your wet sand mixture before it dries. This adds a whimsical touch and can create enchanting layers if you use different colors.
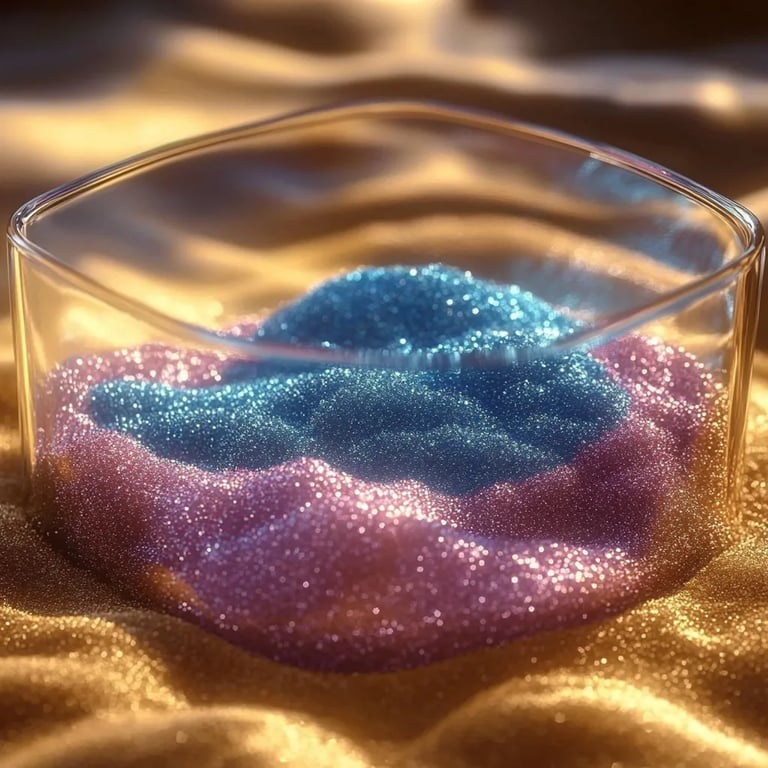
2. Sparkling Sand
Mix in some glitter for a magical effect. Perfect for sensory play or decoration!
3. Sand Art
Create different shapes using molds while the sand is still wet. Once dry, you can even paint them if desired!
Safety Precautions
Although this is a relatively safe craft, it's always best practice to consider some safety measures:
- Use gloves when working with silicone oil to prevent skin irritation.
- Work in a ventilated area if you’re using aerosol sprays. The fumes can get strong, especially in small spaces.
- Keep materials away from face and mouth to avoid accidental ingestion.
Final Thoughts
Making Underwater Magic Sand is not just an experiment—it's an experience! Watching the sand defy water is not only mesmerizing but also gives learners of all ages a tangible understanding of chemistry principles. Whether you’re a seasoned crafter or a curious beginner, I hope this guide has inspired you to create your own batch of magic sand.
So, gather your materials, roll up your sleeves, and dive in. Remember, crafting is all about experimentation and fun! Enjoy every step of the journey, and feel free to share your creations with friends and family. Happy crafting! 💧✨