Creating Glow-in-the-Dark Foam Pile: A Crafting Adventure
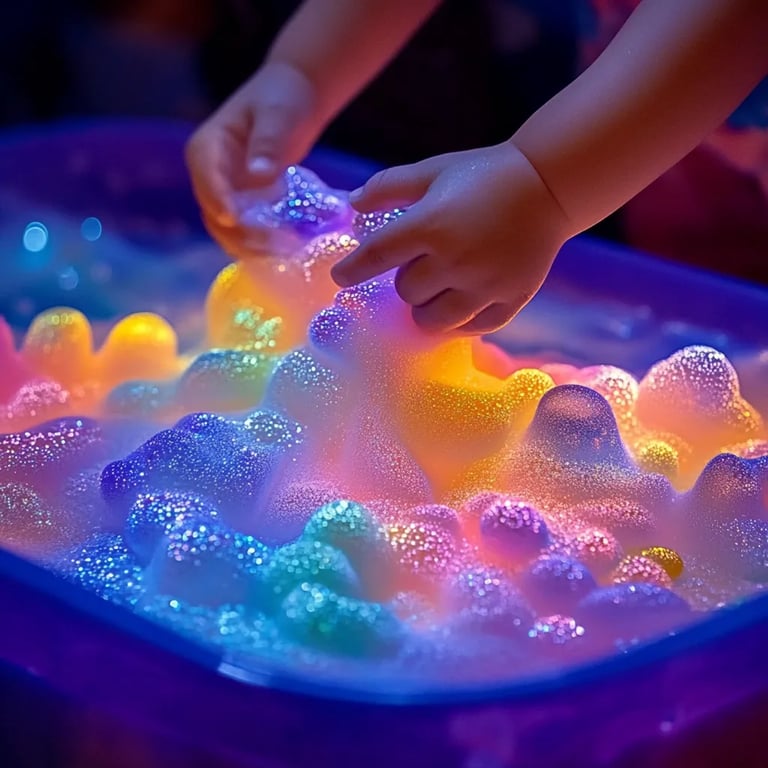
Hello, fellow crafters! I’m thrilled to share my all-time favorite project: making Glow-in-the-Dark Foam Pile! This whimsical, moonlit creation isn’t just for the kids—it brings out the inner child in all of us. Perfect for night-time parties, sleepovers, or even just adding a touch of enchantment to your own space, this glow-in-the-dark foam pile has a magical quality all its own.
Why Glow-in-the-Dark Foam Pile?
The popularity of glow-in-the-dark crafts has skyrocketed, especially among parents looking to create memorable experiences for their children while adding some aesthetic flair to their rooms. You might be wondering, "When would I use this?" The answer is simple: any time you want to create a cozy, dreamy atmosphere! Whether for a star-themed birthday bash or simply to illuminate your child's night with a playful glow, this foam pile is a fun and creative solution.
Now, let’s dive into how to craft your own Glow-in-the-Dark Foam Pile!
What You'll Need
Before we get into the nitty-gritty of crafting, let’s gather everything you’ll need:
Materials:
- Foam Sheets: You can get them from any craft store or online (12×12 inches is a great size).
- Glow-in-the-Dark Paint: Ensure it's non-toxic and suitable for crafting. Brands like FolkArt and Rust-Oleum are fantastic choices.
- Scissors: A good pair of craft scissors will do wonders.
- Hot Glue Gun and Glue Sticks: For adhering the layers.
- White Craft Glue (optional): If you want a more mixed medium for applying paint.
- Bowl/Warming Tray: Only if you need to warm your glue for easier application.
Safeguards:
- Protective Gloves: If you’re sensitive to paint or glue.
- Work Surface Protection: Old newspapers or a disposable table cover would be perfect.
Step-by-Step Tutorial
Now that you have your materials ready, let’s get crafting!
Step 1: Cut Your Foam Sheets
First things first, you’ll want to cut your foam sheets into fun, irregular shapes. I suggest going for clouds, stars, or even whimsical creatures.
*Why it matters:* Irregular shapes add character! They catch the light differently, creating a dynamic appearance when they glow.
*Common pitfalls:* Cutting them too uniformly can make your pile look more “craft project” and less magical.
*Tip:* Don’t worry about making them perfect. The unevenness will contribute to that dreamy aesthetic.
Step 2: Paint Your Shapes
Now, let’s bring some glow to those solids! Use your glow-in-the-dark paint to paint one or both sides of the foam shapes. I love using a light coat on both sides to ensure it glows even brighter at night.
*Why it matters:* A good coat of paint will enhance the glow effect. However, be cautious not to drown the foam in paint; we want it to stay fluffy.
*What could go wrong:* If the paint is too thick, it will seep into the foam, causing it to lose its buoyancy.
*Fix:* If you find this occurring, switch to a lighter touch or consider watering down the paint slightly.
Step 3: Allow to Dry
Once you have beautifully painted your foam shapes, allow them to dry completely—this can take 30 minutes to an hour, depending on the thickness of your paint.
*Why it matters:* If you don’t wait, you risk smudging your beautiful designs.
*Tip:* Consider placing them in direct sunlight during drying; it helps charge the glow effect later!
Step 4: Assemble Your Foam Pile
This is where the fun begins! Use your hot glue gun to stack and layer your shapes into a delightful pile. Feel free to layer them in a way that produces an appealing visual.
*Why it matters:* The arrangement influences how the pile will look both by day and night!
*What could go wrong:* Hot glue can be unforgiving, and if you’re not careful, you might end up with glue strands everywhere.
*Fix:* If you find strings of glue, simply allow it to cool, and then gently pull them off.
Step 5: Display Your Creation
You’ve crafted your Glow-in-the-Dark Foam Pile; now it’s time to display it! Place your creation in an area where it can absorb light throughout the day—like a windowsill or under a light.
*Tip:* Try placing it in a shaded area of the room during daytime to let it charge without direct sunlight.
Alternative Methods and Creative Variations
If you're looking to switch things up, consider these alternative ideas:
- Color Choices: Instead of white or yellow glow paint, explore blue or green options for different effects.
- Add Glitter: For a sparkly touch, consider adding glitter to your foam shapes before the paint dries.
- Magnetized Foam Pile: If you want to make your foam pile movable, glue small magnets to the back of each piece, allowing you to rearrange them on metal surfaces.
Personal Anecdote
The first time I made Glow-in-the-Dark Foam Pile, it was for my daughter’s sleepover. I remember the look on her best friend’s face—the sheer amazement! That memory stuck with me, and I hope to inspire others to recreate those beautiful moments!
Safety Warnings
- Always work in a well-ventilated area, especially when using paint and hot glue.
- Keep any small pieces out of reach of younger children to prevent choking hazards.
In Conclusion
Crafting a Glow-in-the-Dark Foam Pile has been one of the most rewarding projects in my creative repertoire. It’s a delightful way to engage with your inner artist and create something truly unique. As you bring your own glow-in-the-dark creations to life, remember to embrace the creative process, adjust where needed, and enjoy the small moments along the way.
I hope this guide ignites your crafting spirit, and I can’t wait to see what magical creations you come up with! Let your imagination glow brightly! Happy crafting!