Create Your Own Beach Memory Jar: A Cherished Craft to Treasure
As an experienced crafter, I believe that some of the best projects come from our personal memories. One such craft that combines nostalgia with creativity is the Beach Memory Jar. This delightful DIY project allows you to capture the magic of your beach adventures in a way that you can revisit time and time again. Whether you're looking to preserve the tranquility of a summer getaway or seeking to gift a loved one with a unique, heartfelt keepsake, the Beach Memory Jar craft is a fantastic choice!
Why Make a Beach Memory Jar?
Beach memory jars aren’t just pretty decorations; they serve as a tangible reminder of carefree days spent by the ocean, the laughter of friends, and the simple beauty of nature. They're perfect for children and adults alike and can be made at home or as a group activity during beach outings. Imagine sitting around a campfire after a day of sun, sand, and surf, filling your jar with tiny treasures collected along the shore—each piece tells a story.
In this guide, I’ll walk you through a detailed step-by-step tutorial, complete with tips and personal insights gathered over the years. So, grab your crafting supplies and let’s get started!
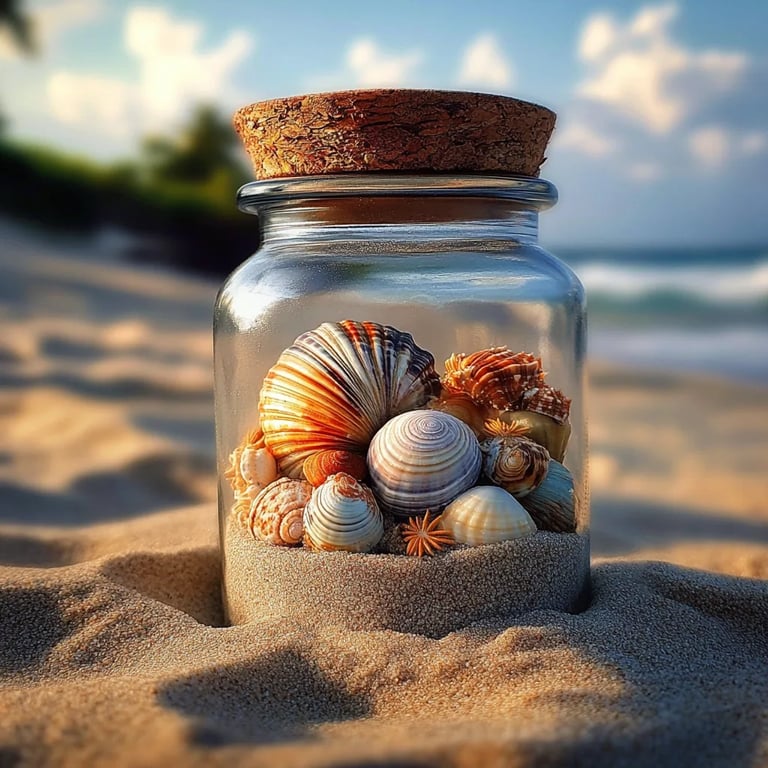
Materials You’ll Need:
- A Wide-Mouth Glass Jar: I love using mason jars because they are sturdy, have a wide opening, and can be sealed tightly.
- Sand: Collected from the beach (make sure it’s legal to take some!) or use decorative sand from a craft store.
- Shells, Pebbles, and Other Beach Treasures: These can include small stones, pieces of driftwood, or even sea glass.
- Decorative Elements: Think of ribbons, twine, or stickers that reflect your beach theme.
- Paper and Writing Tools: For jotting down memories, quotes, or stories to accompany your treasures.
- Mod Podge or Clear Glue: This is optional but can be used to seal decorations.
- Optional: LED Fairy Lights: To add a magical glow to your jar!
Step-by-Step Tutorial
Step 1: Gather Your Treasures
Start by collecting small items from your beach adventures. I often find that the most meaningful items are those that invoke a specific memory—the smooth pebble my son picked up after finding it on the shore’s edge, or the tiny shell that my daughter insisted was a “treasure.”
*Tip*: Always consider the size of your jar. Larger jars can hold more items, but be thoughtful about how the jar will look filled!
Step 2: Create a Layered Effect
Once you’re home, take out your sand and other treasures. Pour a thin layer of sand into the bottom of your jar—this represents the beach itself. As I fill my jar, I often find it helpful to keep stepping back to see how my treasures will look together.
*Don’t worry if you spill some sand—that’s a part of the process! Just clean it up with a damp cloth and move on.*
Step 3: Arrange Your items
Next, add your collected items one at a time. I like to group similar colors or size, creating a visually pleasing arrangement. This could mean placing bigger shells in the back and smaller ones in the front for depth.
*Tip*: Use a small stick or spoon to nudge items down into the sand so that everything stays put when you carry your jar around.
Step 4: Write and Include Memories
Take your paper and writing tools to jot down a few highlights from your beach trip. I often share not only the date but also notes on what made the day special: “Found this shell during our beach picnic!” or “The kids built the biggest sandcastle today.”
*Remember*: Writing memories are just as important as the items themselves. They breathe life into your jar!
Step 5: Seal it Up
Once you’re satisfied with your jar's contents, you can secure your memories using Mod Podge or clear glue on the inside edges and around decorative elements. This will prevent the treasures from shifting too much if the jar gets relocated.
*Safety Note*: If you choose to use Mod Podge, ensure you’re working in a well-ventilated area.
Step 6: Decorate Your Jar
Now comes the fun part! Decorate the outside of your jar with ribbons, twine, or stickers that reflect your beach theme. I love adding a small piece of driftwood tied with some twine around the neck of the jar for a rustic touch.
*Tip*: You might consider labeling your jar with “Beach Memories 2023” to make it even more special!
Step 7: Optional Glow-Up
Adding LED fairy lights can transform your jar into a delightful nightlight or an attractive centerpiece. Simply thread them inside your jar, ensuring they stay clear of the sand and treasures.
Troubleshooting Common Issues
- Items Sink?: If you notice shells sinking into the sand, try rearranging the heavier items or layering with more sand.
- Glue Drying Unsatisfactorily?: Use just enough to secure items without excessively gluing them down—this keeps the artistry intact.
- Jar Too Full?: Make decisions on the most meaningful artifacts. Less can be more when it comes to visual impact.
Creative Variations
- Holiday-Themed Memory Jars: Consider creating a winter memory jar with snow-like Epsom salt and holiday decorations.
- Family Memory Jars: Have different jars for different family members, letting each person curate their collection of memories separately.
- Fragrance Infusion: Add a few drops of essential oils to the sand for a sensory touch that brings back beach vibes whenever you open it.
Final Thoughts
Crafting a Beach Memory Jar is an easy and rewarding project that I encourage everyone to try. It’s a heartfelt way to commemorate special moments spent by the sea. Remember, the beauty of crafting lies in making it your own—there’s no right or wrong way as long as your memories flow.
So the next time you head to the beach, bring along a little container for your treasures, and immerse yourself in the joy of creating a memory jar that you will cherish for years to come! Happy crafting, and may your beach adventures be rich and full of memories!