Crafting Water Bottle Love Bugs: A Step-By-Step Guide to Adorable Recycled Art
Hello, fellow crafters! Today, I'm excited to share one of my all-time favorite DIY projects: creating Water Bottle Love Bugs. These delightful little critters are not only fun to make but also a fantastic way to upcycle plastic bottles into charming decorations or gifts. Whether you're looking to inspire creativity in your children, add a personal touch to a Valentine's Day gift, or simply declutter your recycling bin while having fun, making Water Bottle Love Bugs is the perfect activity.
What Are Water Bottle Love Bugs?
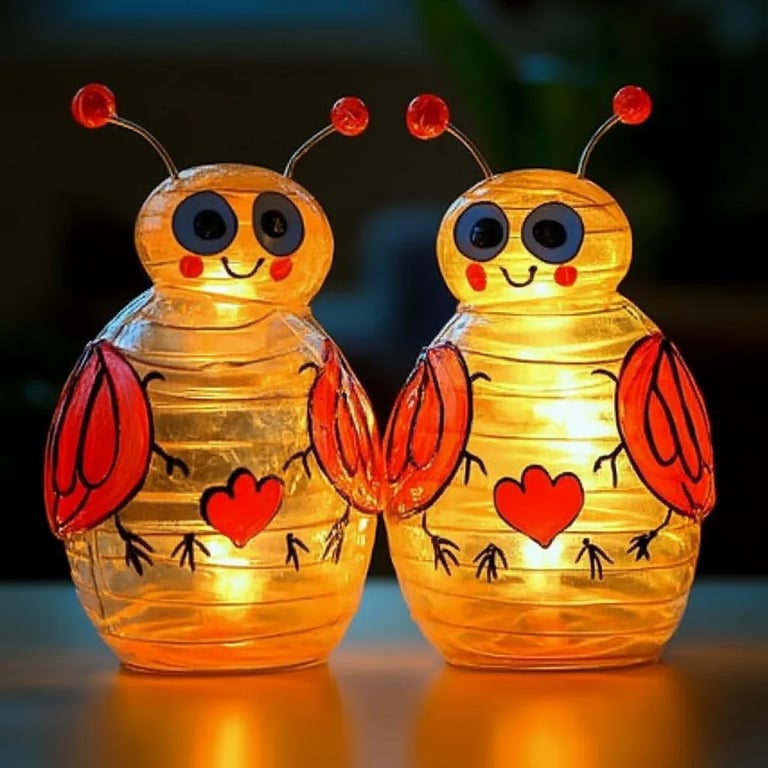
Water Bottle Love Bugs are whimsical, colorful insects created from empty plastic water bottles. They feature bright, vibrant designs and can easily be customized to represent various insects such as ladybugs, butterflies, or even dragonflies. Why are they so popular? Not only do they contribute to recycling efforts, but they also spark creativity and provide a fun, hands-on activity that brings joy to both children and adults alike. Plus, they make for wonderful decorations, perfect for springtime celebrations, birthdays, or simply brightening up your garden!
When Can You Use Them?
These adorable love bugs are not limited to one occasion. You can craft them for:
- Valentine's Day: Gift them to loved ones or use them as party decorations.
- Spring Celebrations: Perfect for Easter or spring-themed parties.
- Birthday Parties: They make delightful favors or decorations.
- Earth Day: A great project to highlight the importance of recycling and environmental stewardship.
- Everyday Decor: Brighten up your home or garden with these cute creations.
Now that I’ve piqued your interest, let’s dive into the crafting process!
What You'll Need
Before we start crafting, gather the following materials:
Basic Materials
- Empty, clean plastic water bottles (1 or 2 for each bug, depending on the design)
- Acrylic paint (various colors for body and details)
- Paintbrushes (a variety of sizes)
- Googly eyes (1-2 per bug, depending on your design)
- Hot glue gun and glue sticks
- Craft scissors
- Pipe cleaners (for antennae and legs)
- Markers or permanent markers (for detailing)
- Clear sealer spray (optional, for added durability)
- Newspaper or a drop cloth (to protect your workspace)
Optional Decorative Materials
- Glitter (for extra sparkle)
- Colored paper or crafting foam (for wings)
- Stickers or stamps (for additional decoration)
Step-By-Step Tutorial
Step 1: Preparing the Bottles
- Clean and Remove Labels: Begin by rinsing your plastic water bottles thoroughly and removing any labels. This will ensure your paint adheres properly.
- Why it Matters: If the surface is not clean, the paint may not stick well, leading to peeling or chipping.
- Cutting the Bottle: Using your craft scissors, carefully cut the bottle in half. The bottom half will serve as the bug's body, while the top half can be used for wings or other decorative elements.
- Tip: Cut slowly and be cautious with the sharp edges. If you find cutting difficult, you can use a craft knife with a parent’s supervision for tough materials.
Step 2: Painting the Body
- Base Coat: Choose your base color for the body and use a larger paintbrush to apply it evenly to the outside of the bottle half. Let it dry completely.
- Common Mistake: It’s easy to rush this step, but ensuring the paint dries fully will prevent smudging when you apply additional layers or details.
- Adding Details: Once the base coat is dry, use smaller brushes to add details like spots (for ladybugs) or stripes (for bees). Encourage your child to explore their creativity with different patterns.
- Fixing Mistakes: If you accidentally overlap the paint, you can touch it up by painting over it once it’s dry.
Step 3: Creating the Face
- Adding Googly Eyes: Using your hot glue gun, carefully attach a pair of googly eyes to the top of the body.
- Safety Warning: Be careful while using the glue gun. The tip can get very hot! If crafting with children, adult supervision is recommended.
- Drawing a Mouth: Use markers to draw a happy face beneath the eyes. This step gives personality to your love bug!
- Tip: Let children create any expression they like—smiling, winking, or even silly faces!
Step 4: Crafting the Antennae and Legs
- Pipe Cleaners: Cut two pieces of pipe cleaner to a length of about 6 inches for the antennae. Twist them at the top and glue them to the head of the bug.
- Alternative Method: If flexible, use craft wire instead for added sturdiness.
- Legs: For smaller legs, cut pieces of pipe cleaner about 4 inches long and attach three legs on each side using hot glue.
- Tip: You can shape the legs into curls at the end for a playful touch.
Step 5: Making Wings (Optional)
- Wing Shapes: If you want your bug to have wings, take the top half of the water bottle and shape it into a wing design. You might want to trace a petal shape or butterfly wings on paper and cut it out to use as a template.
- Alternative Material: Consider using colored paper or foam for sturdier wings.
- Attach the Wings: Once shaped and decorated, glue the wings behind the body for butterflies or on top for ladybugs.
- Pro Tip: Decorate wings with more paint, glitter, or stickers for an extra touch!
Step 6: Finishing Touches
- Sealing Your Bug: If you want your love bugs to last longer, you can spray them with a clear sealer.
- Safety Reminder: Sealants can give off strong fumes, so be sure to use them in a ventilated area.
- Display Your Creations: Once everything is dry and secure, find a fun place to display your Water Bottle Love Bugs! You can hang them from trees, use them as garden dividers, or craft a lovely centerpiece.
Troubleshooting Common Issues
- Paint Not Adhering: If the paint is sliding off, it could be due to a residue on the bottle. Make sure to scrub it well before painting.
- Glue Not Holding: If parts are coming apart, check for excess glue or let it sit longer for better adherence.
- Water Bottle Leaking: Ensure your bottle is thoroughly cleaned and dry before applying paint.
Creative Variations
Feeling adventurous? Here are some creative variations you can try:
- Glow-in-the-Dark Bugs: Use glow-in-the-dark paint for an enchanting effect.
- Seasonal Themes: Decorate with seasonal colors or themes—spider and webs for Halloween, or flowers and butterflies for spring.
- Personalized Gifts: Let your kids create bugs that symbolize their favorite animals or personalities to give as gifts.
Final Thoughts
As you wrap up your crafting adventure, I hope you found joy in making Water Bottle Love Bugs! Crafting is all about exploration and having fun, so don’t hesitate to add your personal flair. Remember, there’s no right or wrong way to create—each bug is uniquely yours. Share your creations with friends and family, and see how many different love bugs you can craft together! Happy crafting!