Crafting Sunshine: How to Make Tissue Paper Leaf Suncatchers
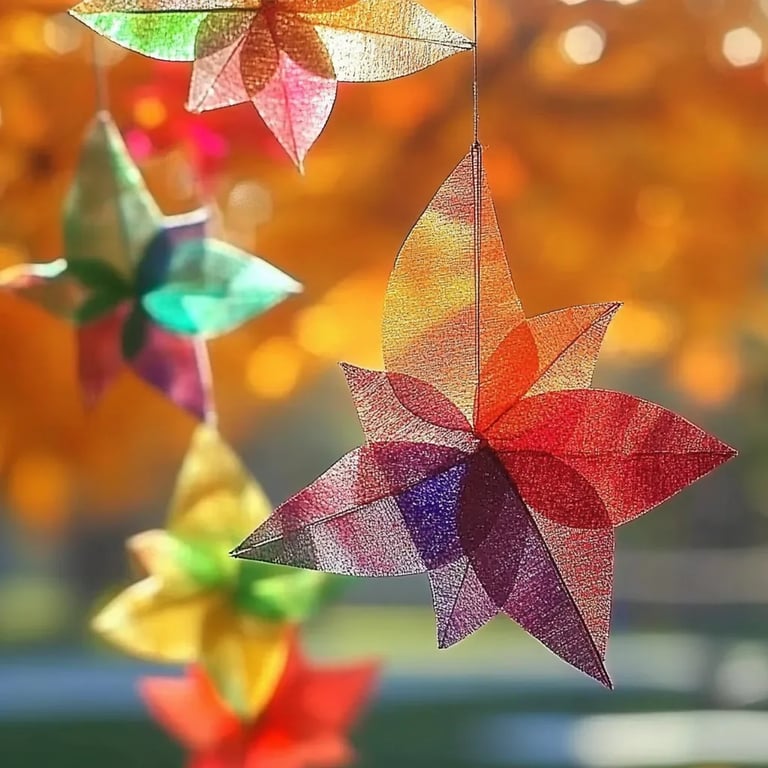
Hello fellow crafting enthusiasts! As an avid crafter who has spent countless hours exploring the world of DIY projects, today I’m thrilled to share with you one of my absolute favorite crafts: Tissue Paper Leaf Suncatchers. This charming project is not only perfect for brightening up your home but also serves as a delightful activity for kids or a nostalgic trip down memory lane for adults. These colorful, translucent leaf designs catch the light beautifully, bringing color and cheer to any window. Let’s dive into this craft, exploring everything you need to know to create your own stunning suncatchers!
Why Suncatchers Are So Popular
Tissue Paper Leaf Suncatchers have become a beloved craft for several reasons. Primarily, they are a fantastic way to introduce young crafters to basic artistic concepts like color mixing, shapes, and texture. Plus, they provide a wonderful opportunity to practice fine motor skills. But suncatchers aren’t just for kids; making them can evoke nostalgia in adults, reminding us of the simple joys of crafting in our childhood. Plus, with seasonal variations, they’re ideal for decorating your home year-round or even giving as handmade gifts!
What You’ll Need
Before we roll up our sleeves, let me guide you through the materials you’ll need for this creative endeavor. Don’t worry — these supplies are budget-friendly and easy to find!
Materials:
- Tissue Paper (variety of colors, preferably fall hues like orange, red, yellow, and green for leaf designs)
- Contact Paper or Wax Paper (Clear adhesive sheets for a smooth finish and light pass-through)
- Scissors (Child-safe scissors for the little ones, if applicable)
- Pencil (For tracing designs)
- Leaf Templates (You can create your own or find printable templates online)
- Craft or Elmer's Glue (optional, for any additional layering)
Optional Materials:
- Black Marker or Pen (to outline the edges and add details)
- String or Ribbon (for hanging your suncatcher)
- Frames or Window Clings (to give your suncatcher a polished look)
Step-by-Step Tutorial
Now that we have our materials, let’s jump into crafting our stunning suncatchers!
Step 1: Create Your Leaf Template
*Why it matters:* The leaf shape is essential to the overall look of your suncatcher. A well-defined template will guide your cutting and tissue placement.
- Take a piece of paper or cardstock, and draw or print out a leaf shape. Feel free to use various sizes to create a layered look later! The simpler the shapes, the easier they will be to cut and assemble.
- Cut out the leaf shape carefully.
Step 2: Prepare the Background
*Why it matters:* Choosing how to adhere the tissue paper is crucial; it affects both durability and ease of crafting.
- For this project, I'll show you the contact paper method as I find it gives the best results without mess!
- Cut a piece of contact paper slightly larger than your leaf template. If you’re using wax paper, skip to the next step.
- Peel off the backing of the contact paper and place it sticky side up on your work surface.
Step 3: Tear the Tissue Paper into Pieces
*Pro tip:* Tearing the paper can give a more natural and organic feel to your suncatchers compared to cutting. It's also a fantastic sensory activity for children!
- Tear your tissue paper into small pieces. Use a variety of colors; think about mixing complementary colors for visual interest.
- If you didn’t tear it, no worries! Just cut the tissue paper into small squares if that’s your preference.
Step 4: Arrange the Tissue Paper
*What could go wrong:* Overlapping colors that are too dark or similar shades can lead to a muddy result. Aim for contrast!
- Start placing the tissue paper pieces onto the sticky side of the contact paper. Mix and match colors as you go, allowing some overlap to create depth.
- Once you’re satisfied with the design, press the paper pieces gently down to secure them.
Step 5: Seal the Design
- Carefully cut out another piece of contact paper (or wax paper) and place it on top of your tissue arrangement. Smooth out any bubbles or creases to ensure it’s sealed well.
Step 6: Cut Out the Leaf Shape
*Why it matters:* This step transforms your colorful patchwork into a beautiful leaf shape that can now flutter in the sunlight.
- Using your leaf template, carefully cut out the leaf shape while making sure to avoid cutting through the tissue paper if possible. If you’re worried about alignment, you can trace the leaf shape onto the back of your suncatcher before cutting.
Step 7: Add a Hanging Mechanism
- If you plan to hang your suncatcher, now’s the time to add a string or ribbon. Simply punch a small hole at the top of the leaf and thread your string or ribbon through it.
Step 8: Display Your Creation!
- Find a sunny window to display your suncatcher. The sunlight will illuminate your colors, making them glow beautifully!
Creative Variations
As someone who loves to experiment, here are a few alternative ideas you might enjoy:
- Seasonal Themes: Switch up your colors and templates with the changing seasons—think spring flowers or winter snowflakes!
- Layered Designs: Create multiple layers of leaves and stack them for a 3D effect. Use longer pieces of string to give them depth.
- Personalization: Encourage kids to add their names or initial designs using a black marker to make it uniquely theirs.
Tips for Success
- Safety First: Ensure that any younger crafters are supervised, especially around scissors and adhesive materials.
- Don’t Rush: If you notice any areas where the tissue paper is peeling up, simply apply a dot of craft glue on the edges to secure it.
- Practice Patience: If your pieces don’t seem to stick well, take a moment to smooth them out—tissue paper can be delicate.
Final Thoughts
Creating Tissue Paper Leaf Suncatchers is a truly enjoyable, therapeutic project that lights up your living space and your spirits. Whether you’re sharing this experience with children or taking some “me time” to reconnect with your creative side, I hope you feel encouraged and inspired to create something beautiful.
So, gather your materials, clear some space, and let your imagination run wild! I’d love to hear about your experiences and any variations you come up with—let the crafting begin!