Crafting Color Changing Crystal Treasure Stones: A Glittering DIY Adventure
Hello fellow crafting enthusiasts! Today, I am absolutely thrilled to guide you through an enchanting DIY project that’s captured the hearts of many — Color Changing Crystal Treasure Stones. If you’ve ever marveled at the shimmering beauty of crystals and wished to bring some magical charm into your life or your home decor, look no further! These delightful stones not only serve as eye-catching decorative pieces but also as charming gifts, great conversation starters, or even as enchanting party favors.
What Are Color Changing Crystal Treasure Stones?
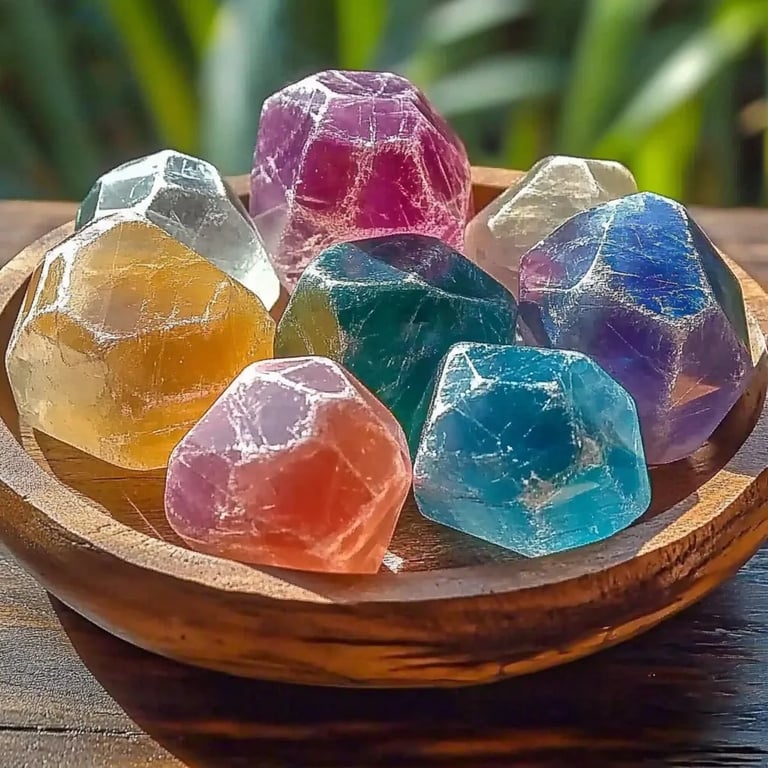
Color Changing Crystal Treasure Stones are resin-based gems that change hue with different lighting or temperatures. Imagine adorning your space with these vibrant stones that shift from radiant turquoise to serene lilac, depending on your mood, the time of day, or the ambiance. They're not just dazzling; they wield a sense of whimsy and mystery that captivates adults and children alike. These little treasures spark joy, making them perfect for birthdays, holidays, or simply as a personal indulgence in your crafting journey.
Why They’re Popular
The popularity of Color Changing Crystal Treasure Stones stems from their versatility and the sheer joy of creation. They blend ancient earth's beauty with modern flair — perfect for crafty souls eager for a sprinkle of magic in their lives. Whether you place them in your garden, use them as table decorations, or gift them to a loved one, their enchanting color shifts provide a unique and mesmerizing touch.
What You'll Need
Before we dive into the crafting process, let me gather the materials you’ll need. You can often find these at your local craft store or online. Here’s your list:
- Epoxy Resin Kit: Look for a kit that comes with both resin and hardener. This is the foundation of your stones.
- Color Changing Pigments: Choose high-quality pigments that are known for their color-changing properties. Be sure to read the labels; some work better with UV light, while others react to temperature.
- Silicone Molds: You can find various shapes online; I love using molds that resemble natural crystals to give my stones a unique look.
- Mixing Cups and Sticks: These will help you mix your resin and pigments smoothly.
- Safety Gear: This includes gloves, a mask, and a protective apron to avoid any contact with the resin.
- Coffee Filters or Fine Mesh Strainer (optional): For those who want to remove bubbles from their mixture.
Step-by-Step Tutorial
Step 1: Prepare Your Workspace
Preparation is key! Choose a well-ventilated area where you can work comfortably without distractions. Lay down a plastic table cover or newspaper to protect your surfaces. It might sound basic, but a clean workspace will help you stay organized and focused, keeping your crafting experience enjoyable.
Step 2: Measure Your Resin
Following the instructions provided with your resin kit, measure equal parts of resin and hardener. I often use small mixing cups for precision. Tip: Working with resin can get a bit messy, so it’s a good idea to have some paper towels handy for any spills.
Step 3: Mix the Resin
This is where the magic begins! Pour the resin and hardener into one of your mixing cups and stir gently but thoroughly for about 2-3 minutes. Important: Make sure to scrape the sides and bottom of your cup while stirring. If you don’t mix well enough, your stones might not cure properly, leading to a soft, tacky finish.
Step 4: Divide and Add Pigments
For vibrant, eye-catching stones, I recommend separating your resin mixture into smaller cups based on how many colors you want to use. Add the color-changing pigments to each cup. Caution: Always follow the pigment recommendations for the correct amount; too much pigment can alter the curing process. Stir well until the colors are evenly distributed.
Step 5: Pour Into Molds
Now comes the exciting part! Carefully pour your colored resin into the silicone molds. You can layer the colors for a beautiful effect. Tip: If you want to create a special pattern, try pouring each color in quick succession without waiting for the previous layer to fully set. This creates a marbled effect.
Step 6: Remove Bubbles
After pouring, you might notice some bubbles forming on the surface. If you do, gently heat the surface with a heat gun or a lighter (carefully, for a short duration) to eliminate those pesky bubbles. This step is crucial because trapped air can disrupt the clarity and beauty of your stones.
Step 7: Let Them Cure
Patience is truly a virtue in crafting! Allow your stones to cure as per the instructions on your resin kit – usually around 24 hours. Remember, the curing time is important, as removing them too early might result in deformities. I often cover molds with a clean cloth to protect them from dust.
Step 8: Demolding
Once fully cured, it’s time for the grand reveal! Gently flex the mold to release your stones. If you've chosen a high-quality silicone mold, they should pop out effortlessly. Tip: If any sharp edges remain, you can lightly sand them down for a smooth finish.
Troubleshooting Common Issues
Sometimes things don’t go as planned. Crafting can be unpredictable, but don’t fret! Here are a few challenges you might encounter:
- Sticky or Soft Stones: If this happens, it usually means the resin wasn't mixed properly or the proportions of resin and hardener were off. To fix this, try placing the stones in a warm, dry place and allow them to cure for a few more days.
- Bubbles Remain After Curing: A fun trick for this is to use a fine mesh strainer when mixing to capture stubborn bubbles. You can also use a tiny drill to make holes and fill with new resin.
- Dim Colors: If your colors aren’t as vibrant as you’d like, future projects can benefit from adding more pigment. Experimentation is key!
Safety Precautions
Safety should always come first in crafting, especially when working with resin. Make sure you wear gloves to protect your hands and a mask, as resin fumes can be irritating. If you’re crafting indoors, ensure there’s proper ventilation.
Personal Anecdotes and Creative Variations
I remember my first attempt making these stones; I was filled with excitement and dread. My colors turned out muddy due to over-mixing, but I learned from that and now embrace the organic, one-of-a-kind properties of resin. Don't be afraid to make mistakes; they often lead to beautiful surprises!
You can experiment with different molds, adding sparkles, or even small items like dried flowers or glitter to your stones. Each stone can tell a story, making your crafting journey truly unique!
Conclusion
Creating Color Changing Crystal Treasure Stones is not just about crafting anymore; it’s about embracing creativity and letting your imagination run wild. With a little practice, you’ll find yourself producing eye-catching stones that will add charm and whimsy to any space. Whether for yourself or as gifts for loved ones, remember that every stone carries a personal touch thanks to your creative spirit.
So gather your materials and unleash your inner artist! I can’t wait to hear about your glittering adventures. Happy crafting!