Craft Your Own DIY Dyed Salt Tray: A Step-by-Step Guide
Hello fellow crafters! If you’re looking for a fun, engaging activity that doesn’t just produce a beautiful end product but also serves a purpose, you’ve landed in the right place. Today, I want to share my passion for crafting with you by demonstrating how to make your own DIY Dyed Salt Tray. This project is not just an aesthetic delight but also a versatile tool for sensory play, teaching activities, or even just to keep around the house as a beautiful decoration.
What is a Dyed Salt Tray?
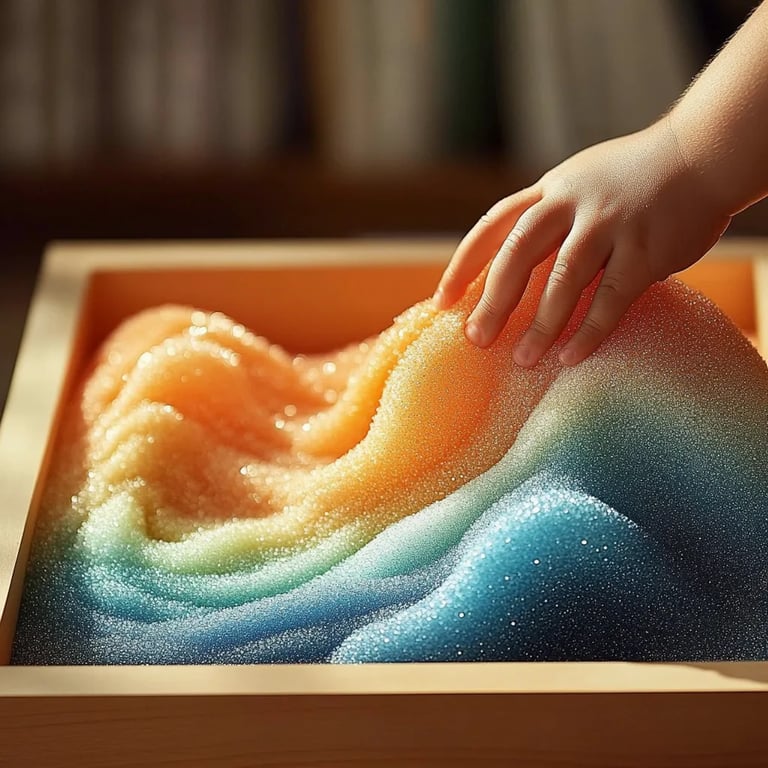
A dyed salt tray is essentially a shallow tray filled with colored salt, often used for tactile exploration, art projects, or therapeutic activities. I’ve found that its colorful appearance invites creativity and play, making it a popular choice for parents, teachers, and crafters alike. Whether you’re using it for sensory play with kids or as an elegant home décor piece, a dyed salt tray can add a splash of color and fun to any space!
Why It's Popular
The popularity of dyed salt trays lies in their versatility. They are great for:
- Sensory Play: Perfect for toddlers and preschoolers, helping them explore textures and colors.
- Learning: A fantastic tool for teaching letters, numbers, or even art skills.
- Mindfulness: A calming medium for adults to explore art and creativity, offering tactile stimulation.
I’ve often found that the process of creating the trays can be just as enjoyable as using them—providing a meditative and artistic outlet for all ages.
Step-by-Step Tutorial to Make Your Own DIY Dyed Salt Tray
Materials Needed
Here’s what you’ll need to create your stunning dyed salt tray:
- Salt: Regular table salt works fine, but coarse salt can add a beautiful texture.
- Food Coloring: Liquid food coloring or gel coloring both work well. You can mix various colors for unique shades.
- Baking Sheet: This is essential for drying the dyed salt.
- Parchment Paper or Wax Paper: To line the baking sheet and make cleanup easier.
- Tray: Any shallow container will do! Wooden trays, small baking dishes, or even plastic containers are great options.
- Gloves: If you’re concerned about staining your hands, it’s good to have a pair handy.
- Airtight Container: For storing your colored salt if you have any leftovers.
Instructions
Step 1: Prepare Your Baking Sheet
First things first, preheat your oven to 200°F (about 95°C) and line your baking sheet with parchment or wax paper. This will help prevent sticking and make it much easier to transfer your dyed salt later.
—
Tip: The parchment paper is also great for spreading out the colored salt, allowing it to dry evenly.
Step 2: Measure and Mix Your Salt
Pour about 1 cup of salt into a mixing bowl. This amount can be adjusted based on how much colored salt you want, but I’ve found that starting with this amount is manageable without overwhelming the workspace.
—
Why It Matters: Using a bowl for mixing helps control the mess, especially when we start adding dye.
Step 3: Dyeing the Salt
Add a few drops of your chosen food coloring to the salt. Start with less, as you can always add more for a bolder color. Use a spoon or your hands (with gloves) to mix the salt and dye together thoroughly until you achieve an even color.
—
Common Problem: If the dye doesn’t mix well, it might clump. To fix this, try breaking up the salt clumps with the back of a spoon or the tips of your fingers.
Step 4: Spread and Dry the Salt
Once your salt is uniformly colored, spread it evenly over the prepared baking sheet. This step is crucial as it allows for proper drying of the salt.
—
Caution: Be sure to wear gloves during this process if you’re using gel food coloring! It can stain your fingers.
Step 5: Bake the Salt
Place the baking sheet in the preheated oven and let it bake for about 20–30 minutes. Keep an eye on it; you want it dry but not overly hot.
—
Why This Step is Important: Baking the salt helps to remove moisture, leaving you with beautifully colored, dry salt. Undried salt can clump when stored!
Step 6: Cool and Store
After baking, allow the salt to cool completely before handling it. Once cooled, transfer the dyed salt to your chosen storage container or directly into your decorative tray.
—
Alternative Method: If you don’t want to use the oven, you can let your dyed salt air dry for a day or so. Just make sure to spread it out thinly on a surface.
Personal Anecdote
I remember when I first tried this project with my children. We were captivated by how the salt turned from plain white to vibrant colors with just a few drops of dye. It turned into a fantastic bonding experience, and we had so much fun mixing colors together to create unique shades. Watching their joy as they played with the finished salt tray made the whole mess worth it!
Creative Variations
- Layering Colors: Instead of mixing all the colors beforehand, you can create layers in your tray for a visually stunning effect.
- Scents: Consider adding a few drops of essential oils or vanilla extract to your salt for a delightful sensory experience.
- Seasonal Themes: Use colors based on seasonal holidays—orange and black for Halloween, red and green for Christmas, or pastels for Easter!
Tips for Success
- Safety First: Always supervise younger children during sensory play, ensuring that they don’t ingest the salt.
- Storage: When storing the finished salt, make sure to seal it tightly to prevent moisture from making it clump.
- Experiment: Don’t hesitate to experiment with different textures or types of salt, dyes, and trays! Your creativity can create a unique masterpiece.
In Conclusion
Creating a DIY dyed salt tray can be a rewarding experience, giving you a beautiful and functional craft piece that can entertain or calm. Whether you’re using it for sensory play, teaching moments, or as a part of your décor, I hope this guide inspires you to get crafty and showcase your creativity.
So gather your materials, connect with your inner artist, and enjoy the process. Crafting is not just about the end product—it’s about the joy of creation. Happy crafting!