Bubble Painting Adventure: A Creative Journey for Everyone
Hello, fellow crafters! Today, I’m thrilled to take you through one of my absolute favorite creative projects: Bubble Painting! This fun and imaginative craft transcends age, making it perfect for kids, adults, or anyone in between looking to unleash their artistic flair. Bubble Painting combines the playful nature of bubbles with the vibrant world of painting, resulting in mesmerizing designs that will brighten your space and delight your creativity!
Why Bubble Painting is Popular
Bubble Painting has gained popularity for a multitude of reasons. First and foremost, it’s a fantastic way to engage with both creativity and science. The bubbling process creates unique patterns that can’t be replicated with traditional painting methods. Additionally, this activity encourages sensory experiences and fine motor skills in children, and it’s a calming creative outlet for adults looking to unwind. It can be a great group activity for parties, educational settings, or just a cozy afternoon at home with family or friends.
Now, let’s get started on our Bubble Painting adventure!
What You'll Need:
Materials:
- Bubble solution: You can make your own or buy ready-made bubbles.
- Liquid watercolor paints or food coloring: These provide vibrant colors that stand out on paper.
- Straws: Standard drinking straws work best, but you can use wider ones for bigger bubbles.
- White cardstock or watercolor paper: These surfaces will hold the colors beautifully and prevent bleeding.
- Plastic containers or bowls: For mixing and containing your bubble solution and paints.
- Apron or old clothes: This project can get messy, so wear something you don’t mind getting stained!
- Water: For diluting your paints and mixing your bubble solution.
- Paper towels: To clean up any spills.
Optional Items:
- Gloves: If you prefer to keep your hands clean.
- Stencils or templates: These can guide your designs.
Step-by-Step Tutorial
Step 1: Make Your Bubble Solution
I always recommend experimenting with homemade bubble solutions. Here’s a simple recipe:
- 1 cup of dish soap
- 6 cups of water
- 1 tablespoon of corn syrup
Mix these in a large container. The corn syrup helps create stronger, longer-lasting bubbles.
Tip: If you find your bubbles are popping too easily, try adding a little more corn syrup.
Step 2: Prepare Your Colors
In a separate container, mix a few tablespoons of liquid watercolor or food coloring with some water (roughly a 1:2 ratio). The idea is to create a vibrant mix, but not too diluted to lose color.
Why this matters: The stronger concentration will provide bolder colors against the white paper!
Step 3: Set Up Your Workspace
Lay down plastic sheets or newspaper where you’ll be working to protect surfaces. Arrange your bubble solution, colored water, and papers in an easy-to-reach layout.
Personal Anecdote: I once overlooked this step and found bright blue doodles on my kitchen table for weeks!
Step 4: Create Your Bubbles
Use a straw to blow gently into the bubble solution, creating bubbles that rise above the rim of your container. The key here is patience—don’t rush it!
Warning: Avoid inhaling the bubble solution while blowing; it’s not toxic, but let’s skip the surprise soap taste!
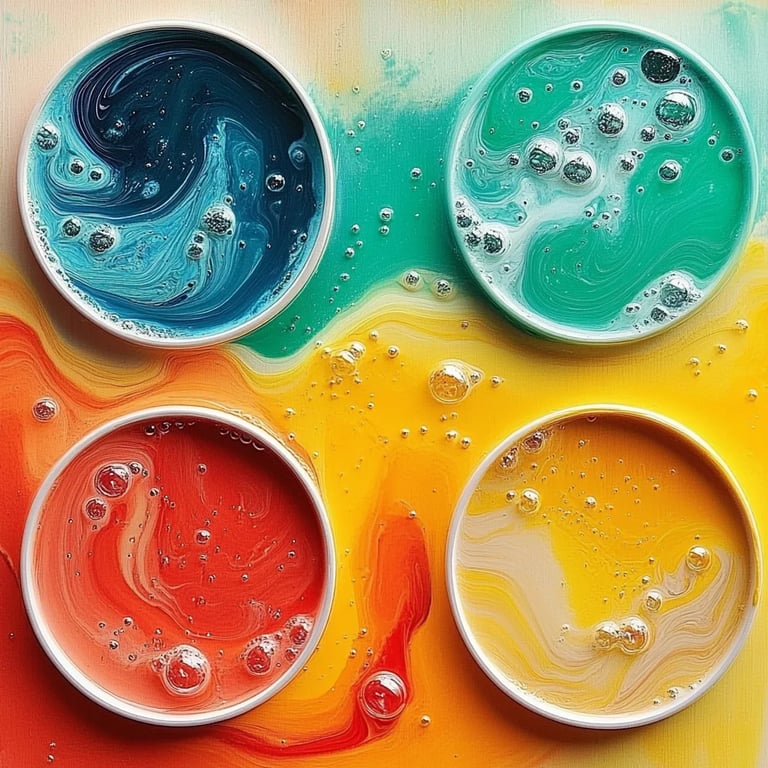
Step 5: ‘Pop’ the Magic onto Paper
Once you’ve got a frothy mass of bubbles, carefully place your cardstock over the top so that the bubbles touch the paper and pop. As they pop, they will leave behind bursts of color.
Tip: For a fun twist, try blowing bubbles onto the paper from different angles for unique patterns!
Step 6: Let It Dry
Carefully lift the painting to a flat surface and allow it to dry. The drying process is as exciting as seeing the finished product; colors will meld and transform as they dry!
Step 7: Display Your Artwork!
Now that your artwork is dry, find a special place to showcase it. Whether it’s on your refrigerator, framed on a wall, or in a gallery on your social media accounts, each piece is a unique testament to your creative spirit.
Troubleshooting
What could go wrong?
- Colors look dull: Check your paint to water ratio; you might need to boost the color concentration.
- Bubbles keep popping: If your straw is too wide, the air pressure will cause bubbles to burst too easily. Try using a standard straw or blowing more gently.
How to fix it: Always have extra paper handy for retrying and refining your results.
Creative Variations
Feeling adventurous? Here are some ideas to sprinkle some extra creativity onto your Bubble Painting:
- Mixing Colors: Experiment by layering colors; try one color on top of another to create gradients!
- Bubble Shapes: Use stencils to create fun designs, such as hearts or stars.
- Nature-Themed: Try making abstract depictions of sunsets or landscapes by using different color palettes.
Safety Warnings
While Bubble Painting is generally safe, make sure to supervise young crafters to avoid swallowing bubble solutions or any materials. Keep all craft supplies out of reach of small children when not in use.
Final Thoughts
Bubble Painting is more than just a craft; it's an exploration of creativity, color, and fun! I love this project not only for the vibrant results but also for the joy it brings to everyone involved. Crafting is all about experimenting—don’t be afraid to make mistakes or let your unique style shine through.
Happy crafting, and may your Bubble Painting Adventure be colorful and memorable!